Table of Contents
ToggleCraving a rich, creamy, and perfectly caramelized creme brulee but without dairy or eggs? You’re in the right place! This Classic Creme Brulee Recipe keeps all the indulgence of the traditional French dessert—silky smooth custard with a crisp, caramelized sugar topping—while using plant-based ingredients instead of heavy cream and eggs.
With a few simple swaps, you can create a dairy-free, eggless creme brulee that tastes just as decadent as the original. Whether you prefer the richness of coconut milk, the nuttiness of cashew cream, or the protein-packed smoothness of silken tofu, there’s a version here for you. In this post, we’ll explore five irresistible vegan twists, including an almond milk variation and even a chocolate-infused creme brulee for extra indulgence.
Which version will be your favorite? Keep reading to find out and discover how easy it is to make this classic dessert 100% plant-based! Check out more delicious recipes on the Toss Recipes for inspiration.
Why Choose a Vegan Creme Brulee?
Choosing a vegan creme brulee isn’t just about avoiding dairy and eggs—it’s a delicious, health-conscious, and sustainable way to enjoy this classic dessert. Whether you’re lactose-intolerant, following a plant-based lifestyle, or simply looking for a lighter alternative, a dairy-free creme brulee offers several benefits without compromising on flavor or texture.
1. Health Benefits of a Dairy-Free Creme Brulee
Traditional creme brulee relies on heavy cream and egg yolks, making it high in cholesterol and saturated fat. A plant-based version swaps these ingredients for coconut milk, cashew cream, or almond milk, which are naturally lower in unhealthy fats and free from cholesterol.
Additionally, using natural sweeteners like maple syrup or coconut sugar instead of refined sugar can create a more wholesome dessert. Some versions even incorporate silken tofu, adding plant-based protein while maintaining a creamy texture. By making these swaps, you can enjoy a decadent dessert with fewer processed ingredients and a healthier nutrient profile. For more protein-packed vegan ideas, try this protein pudding recipe.
2. Ethical & Environmental Benefits of Plant-Based Desserts
Did you know that traditional creme brulee has a higher environmental impact due to dairy and egg production? Plant-based creme brulee significantly reduces carbon footprint, water consumption, and land use. Dairy farming is one of the biggest contributors to greenhouse gas emissions, while egg production raises concerns about ethical treatment of animals.
By choosing a vegan creme brulee, you’re opting for a more sustainable and cruelty-free alternative without sacrificing indulgence. Plus, many dairy-free ingredients—such as coconut cream and almond milk—come from more sustainable sources, making this a dessert that’s kind to both your body and the planet.
3. Taste and Texture Comparison with Traditional Versions
One of the biggest misconceptions about vegan creme brulee is that it lacks the creamy, luxurious texture of the original. However, plant-based alternatives like coconut cream, blended cashews, and silken tofu create an ultra-smooth, custard-like consistency that’s just as rich as traditional versions.
For the signature caramelized sugar topping, turbinado sugar works just as well as regular sugar, delivering that perfect, crackly crust when torched. In fact, some people find vegan creme brulee even silkier than its egg-based counterpart, thanks to the natural smoothness of non-dairy ingredients.
So, whether you’re looking for a healthier, more ethical, or equally delicious alternative, a dairy-free creme brulee proves that you don’t need eggs or cream to enjoy this classic French dessert. Ready to try it for yourself? Keep reading to explore five irresistible vegan variations!
Essential Ingredients for Vegan Creme Brulee
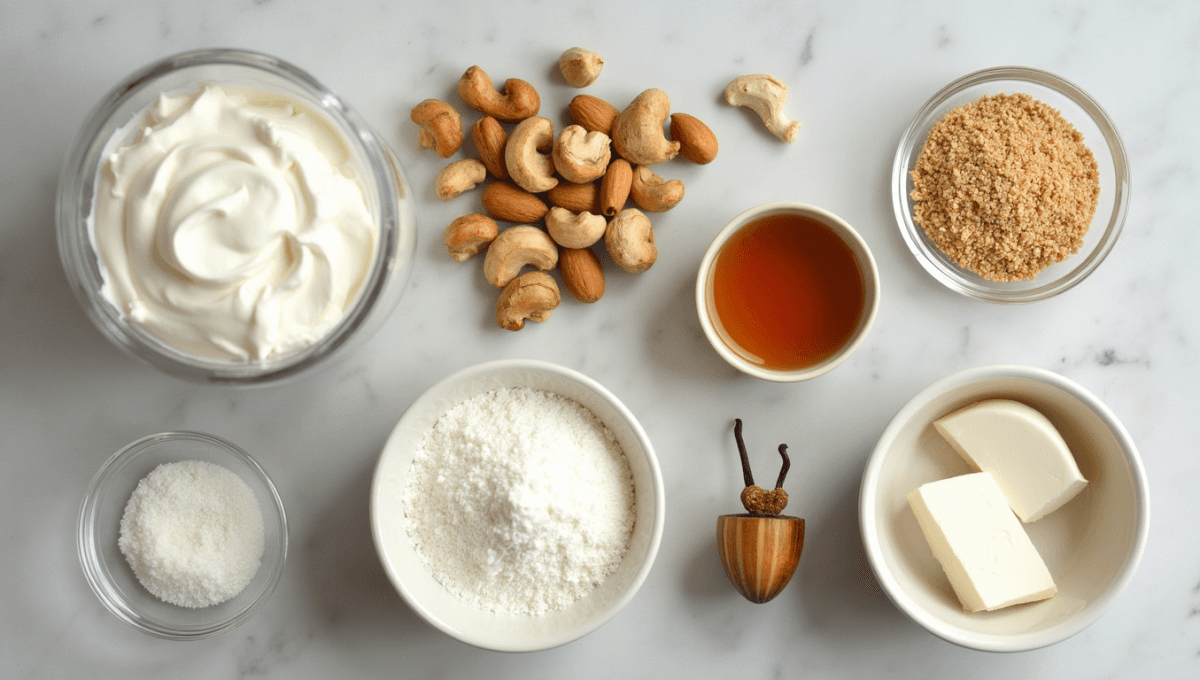
Creating a vegan creme brulee requires just a few simple swaps to achieve the same silky custard texture and caramelized sugar topping as the traditional version. By using plant-based ingredients, you can maintain the rich, creamy consistency while keeping it completely dairy-free and eggless. Let’s explore the essential components that make this dessert both indulgent and wholesome.
Base Ingredients
The key to a smooth, creamy custard in vegan creme brulee is choosing the right dairy-free alternatives. These plant-based options mimic the richness of heavy cream and eggs while adding their own unique flavors and textures:
Coconut Cream – This is one of the best substitutes for heavy cream in creme brulee. It provides a rich, velvety texture and a slight natural sweetness. Opt for full-fat coconut cream to ensure the right consistency. Love coconut? Try this coconut custard pie recipe for another creamy treat.
Cashews – When blended, soaked cashews create an ultra-creamy base that closely resembles traditional custard. Cashew-based creme brulee is smooth, slightly nutty, and packed with plant-based protein.
Almond Milk – A lighter alternative, almond milk adds a subtle nutty flavor without overpowering the dish. It works well when paired with coconut cream or cashews for added richness.
Silken Tofu – This secret ingredient helps achieve a smooth, pudding-like consistency while adding protein and structure to the custard. When blended, silken tofu becomes completely creamy with no detectable soy taste.
Sweeteners
Instead of refined white sugar, using natural sweeteners enhances the flavor while keeping this dessert less processed:
Maple Syrup – Adds a mild caramel-like sweetness and blends smoothly into the custard base. It also complements the flavors of vanilla and coconut beautifully.
Coconut Sugar – This unrefined sugar has a deep, rich flavor that enhances the natural sweetness of the creme brulee. It’s also a lower-glycemic alternative to regular sugar. Pair it with this brown sugar shaken espresso recipe for a sweet morning boost.
Thickening Agents
Since traditional creme brulee relies on eggs for structure, plant-based thickening agents help achieve the perfect custard consistency:
Agar-Agar – A plant-based gelatin alternative derived from seaweed, agar-agar helps set the custard without the need for eggs. It creates a firm yet silky texture.
Cornstarch – This common thickener helps bind the ingredients together and ensures a smooth, creamy consistency without separating.
Flavor Enhancers
To replicate the classic flavor of creme brulee, these ingredients are essential:
Vanilla Bean – Fresh vanilla bean or high-quality vanilla extract adds a deep, aromatic sweetness to the custard. Vanilla is key to achieving the classic creme brulee flavor. For a mini vanilla treat, check out this mini vanilla sponge cake recipe.
Turbinado Sugar for Caramelization – This raw sugar has larger crystals, which caramelize beautifully when torched, creating the signature crisp, golden-brown topping.
Pro Tip: Using a culinary torch creates the best caramelized sugar topping! Simply sprinkle turbinado sugar over the chilled custard and torch it until golden and crisp. This step is essential for achieving the crackly, glass-like layer that makes creme brulee so irresistible.
By using these plant-based ingredients, you can create a deliciously creamy, dairy-free creme brulee that’s just as indulgent as the original. Now, let’s move on to the step-by-step recipe and discover five vegan twists on this classic dessert!
How to Make Vegan Classic Creme Brulee
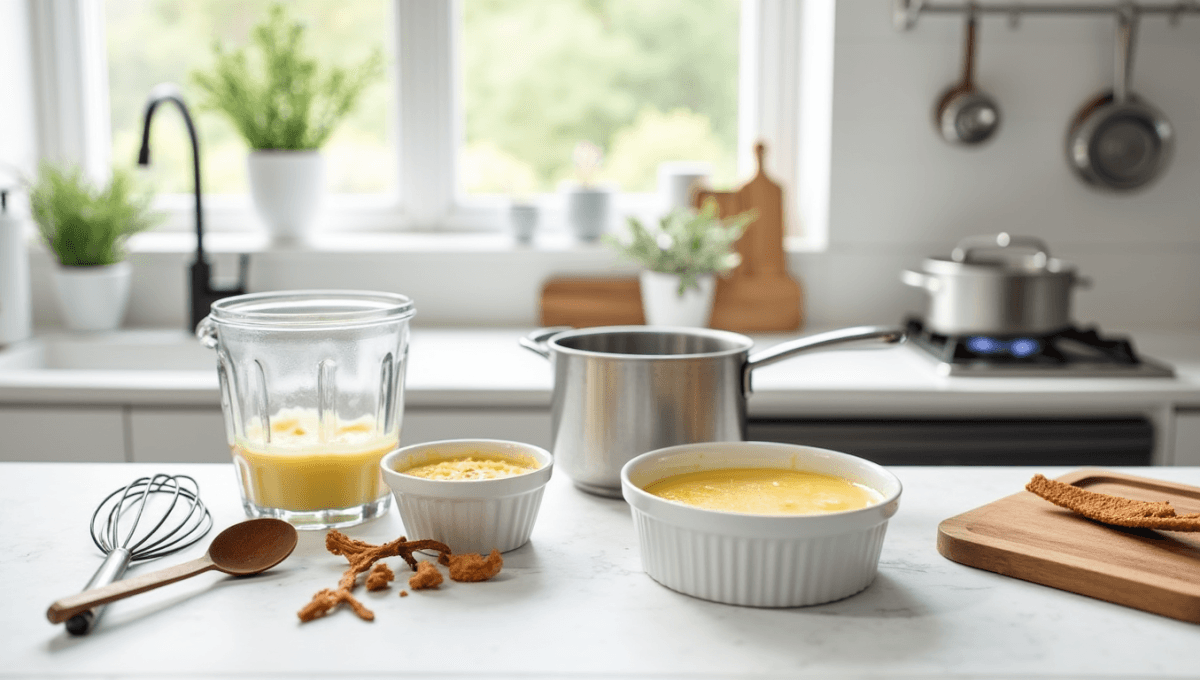
Making a vegan creme brulee is easier than you might think! With a few simple steps, you can achieve a rich, creamy custard topped with the signature caramelized sugar crust—all without using dairy or eggs. Follow this step-by-step guide to create the perfect plant-based creme brulee right in your own kitchen.
Step 1: Blend Cashews and Coconut Cream for a Smooth, Creamy Custard Base
To achieve a lusciously smooth texture, start by blending your base ingredients:
If using cashews, soak them in hot water for 30 minutes to soften.
Add the soaked cashews (or silken tofu) to a high-speed blender along with coconut cream, maple syrup, and vanilla bean.
Blend on high until the mixture becomes completely smooth and creamy. This step is crucial for a silky, custard-like consistency.
For best results, use a reliable blender like the Vitamix Professional Series Blender to ensure a velvety texture.
Pro Tip: Strain the mixture through a fine-mesh sieve for an extra-smooth texture!
Step 2: Heat the Mixture with Vanilla Bean and a Thickener
Now, it’s time to cook the custard so it sets properly:
Pour the blended mixture into a saucepan over medium heat.
Stir in agar-agar (or cornstarch) and whisk continuously to prevent lumps.
Allow the mixture to gently simmer for 3-5 minutes, stirring frequently until it thickens slightly.
Once the mixture coats the back of a spoon, remove it from the heat.
Note: Agar-agar activates at 185°F (85°C), so make sure the mixture is hot enough for it to work properly.
Step 3: Pour into Ramekins and Refrigerate
Now that the custard is ready, it’s time to set it:
Carefully pour the warm creme brulee mixture into individual ramekins or heatproof dessert cups.
Let them cool at room temperature for about 10 minutes.
Cover and refrigerate for at least 3 hours (or overnight for the best texture).
The custard will firm up as it chills, creating a smooth, creamy consistency.
Pro Tip: Placing the ramekins on a baking tray makes them easier to transport to the fridge.
Step 4: Sprinkle Turbinado Sugar and Torch for Caramelized Perfection
The hallmark of classic creme brulee is the crunchy, caramelized sugar topping. Here’s how to get that perfect golden crust:
Remove the chilled custards from the fridge and gently blot the surface with a paper towel to remove any moisture.
Evenly sprinkle turbinado sugar (or raw cane sugar) over the top of each custard.
Using a culinary torch, carefully melt and caramelize the sugar until it turns golden brown and forms a hard, glass-like layer.
Let the sugar topping cool for 1-2 minutes before serving.
No torch? You can caramelize the sugar under a broiler for 1-2 minutes, watching carefully to prevent burning.
Step 5: Serve and Enjoy!
Once the sugar crust is set, it’s time to crack into your delicious vegan creme brulee!
Use a spoon to tap the crispy caramelized topping and break through to the creamy custard below.
Serve immediately for the best contrast between the warm, crunchy sugar layer and the cool, silky custard.
Enjoy as is, or garnish with fresh berries or a sprig of mint for an elegant touch. For a berry-inspired dessert, try this strawberry compote recipe as a topping.
Now that you’ve mastered the classic creme brulee recipe, why not experiment with different plant-based variations? Keep reading to discover five irresistible vegan twists on this dessert!
5 Irresistible Vegan Twists on Classic Creme Brulee
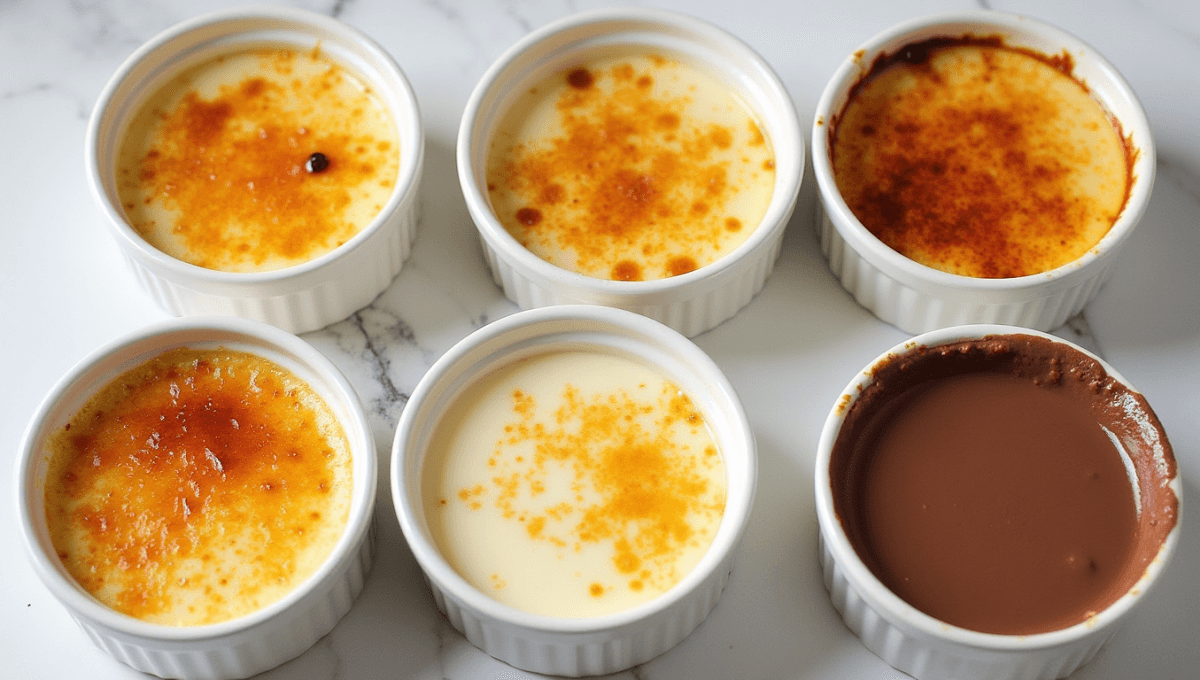
If you love the idea of a plant-based creme brulee but want to experiment with unique flavors and ingredients, these five irresistible variations are perfect for you! Each version offers a delicious twist on the classic creme brulee recipe, using different dairy-free bases and natural sweeteners to achieve the perfect smooth and creamy texture.
1. Coconut Milk Creme Brulee – Rich & Creamy with Natural Sweetness
For a tropical-inspired take on creme brulee, this version swaps traditional dairy for full-fat coconut milk, resulting in a lusciously smooth custard with a subtle hint of coconut.
Why You’ll Love It:
Naturally rich and creamy
Slightly sweet with a hint of coconut flavor
Dairy-free and simple to make
How to Make It: Use full-fat coconut milk as the base and pair it with vanilla bean and coconut sugar for an extra depth of flavor.
2. Cashew-Based Creme Brulee – Super Silky & Nutty Flavor
Cashews create an ultra-smooth, velvety texture, making them a perfect base for a vegan creme brulee. When blended, soaked cashews transform into a rich and custard-like consistency without the need for eggs or dairy.
Why You’ll Love It:
Silky-smooth and decadent
Mild nutty flavor that complements vanilla
High in healthy fats and protein
How to Make It: Blend soaked cashews with almond milk and maple syrup, then cook with a thickening agent like agar-agar to create a perfect custard texture.
3. Tofu Vanilla Creme Brulee – High in Protein, Extra Smooth Texture
If you’re looking for a high-protein, ultra-creamy alternative, silken tofu is a game-changer. It blends effortlessly into a smooth, custard-like consistency and absorbs vanilla flavors beautifully.
Why You’ll Love It:
Packed with plant-based protein
Extra smooth and silky texture
Mild, neutral taste that lets vanilla shine
How to Make It: Blend silken tofu with vanilla bean paste, a natural sweetener like maple syrup, and a thickener like cornstarch for the perfect set. For another tofu-based treat, explore this plant-based egg white bites recipe.
4. Almond Milk & Maple Syrup Creme Brulee – A Healthy Alternative
For a lighter, naturally sweetened version, almond milk and maple syrup create a healthier creme brulee with a delicate nutty flavor.
Why You’ll Love It:
Lower in calories compared to coconut or cashew-based versions
Naturally sweetened with maple syrup
Subtle nutty undertones from almond milk
How to Make It: Use unsweetened almond milk, thicken with agar-agar, and sweeten with pure maple syrup for a guilt-free creme brulee experience.
5. Chocolate Avocado Creme Brulee – Decadent & Ultra-Creamy
For a rich, chocolatey twist on classic creme brulee, try using ripe avocados and cacao powder. This version is indulgent yet wholesome, with a naturally creamy texture.
Why You’ll Love It:
Deep, rich chocolate flavor
Naturally creamy from ripe avocado
Healthy fats and antioxidants from cacao
How to Make It: Blend ripe avocado, coconut cream, cacao powder, and maple syrup for a silky chocolate creme brulee that’s both nutritious and delicious. Craving more chocolate? Try this chocolate cobbler recipe for another indulgent dessert.
Which Twist Will You Try First?
Each of these vegan creme brulee variations offers something unique—whether you prefer classic vanilla, nutty cashew, or indulgent chocolate flavors.
Expert Tips for the Perfect Vegan Creme Brulee
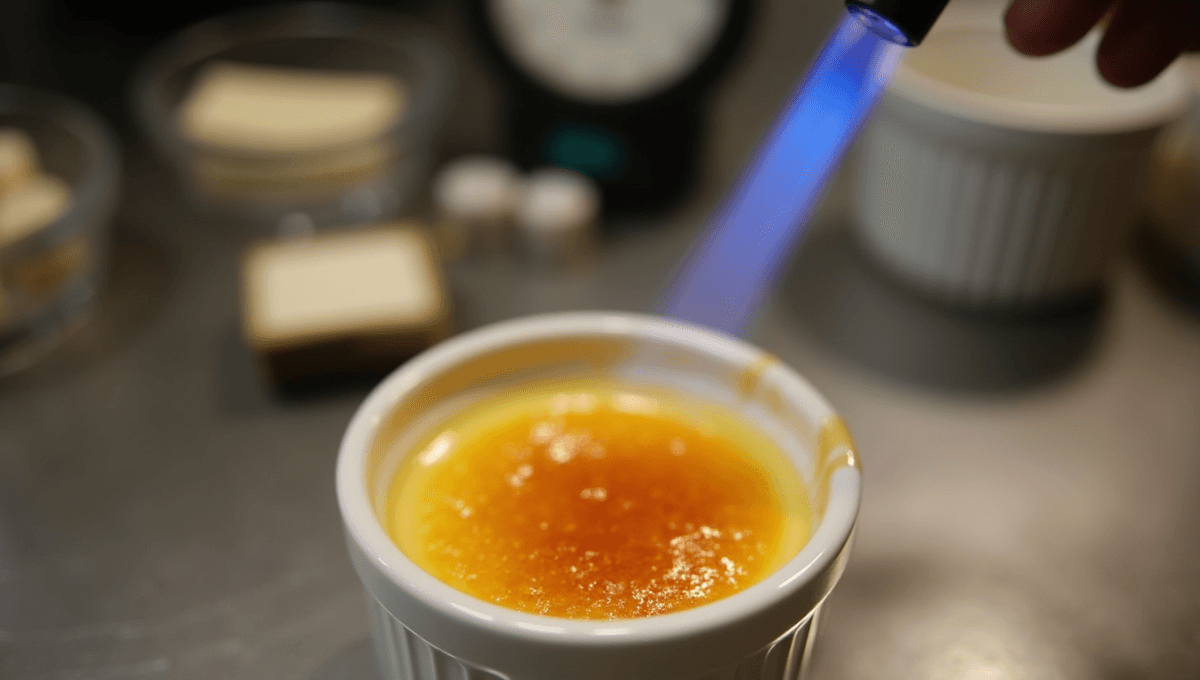
Mastering vegan creme brulee requires just the right techniques to achieve a silky-smooth custard and a perfectly caramelized topping. Whether you’re new to plant-based desserts or looking to refine your skills, these expert tips will help you create a flawless dairy-free creme brulee every time.
1. How to Torch Sugar for the Best Caramelized Topping
The signature crispy caramelized layer is what makes creme brulee so irresistible. Achieving that golden, glass-like crust requires the right type of sugar and the perfect torching technique.
Choose the Right Sugar:
Turbinado sugar – The best choice! It has larger crystals that melt evenly and caramelize beautifully.
Coconut sugar – A healthier alternative that adds a deep, caramel-like flavor.
Granulated sugar – Works well if you don’t have raw sugar, but caramelizes faster, so be careful not to burn it.
How to Torch It Perfectly:
Chill the custard completely before adding sugar—this prevents the top from softening too much.
Sprinkle a thin, even layer of sugar on top of the custard. If it’s too thick, it won’t caramelize evenly.
- Hold the culinary torch a few inches away and move in a circular motion to melt the sugar gradually. A handy tool like this Culinary Butane Torch makes this step a breeze.
Allow the sugar layer to harden for 1-2 minutes before serving—it should be crisp and shatter when tapped.
No torch? Place the ramekins under a broiler for 1-2 minutes, watching closely to avoid burning.
2. Best Non-Dairy Milk Alternatives for Creme Brulee
Choosing the right plant-based milk is crucial for achieving a rich and creamy custard. Here are the best dairy-free alternatives for making the perfect vegan creme brulee:
- Coconut Cream – The closest match to heavy cream, providing a thick, velvety texture and a subtle coconut flavor.
- Cashew Milk – Naturally creamy and mild, cashew milk blends smoothly and complements vanilla beautifully.
- Almond Milk – A lighter option with a delicate nutty taste, great when paired with a richer ingredient like coconut cream.
- Oat Milk – Naturally sweet and creamy, oat milk works well for those who prefer a neutral-flavored creme brulee. Pair it with this Quaker oatmeal cookie recipe for a cozy combo.
- Silken Tofu (Blended) – Creates an extra-smooth, protein-rich custard while maintaining a traditional texture.
Pro Tip: For the best texture, combine two types of plant-based milk, such as coconut cream + almond milk, to get both richness and a balanced flavor.
3. How to Thicken Plant-Based Custards Naturally
Since traditional creme brulee relies on eggs for structure, using the right plant-based thickeners is essential for achieving that silky, spoonable custard consistency.
Agar-Agar:
A plant-based gelatin substitute derived from seaweed.
Helps set the custard without making it too firm.
Works best when simmered with the liquid at 185°F (85°C).
Cornstarch:
An easy-to-use thickener that creates a smooth, creamy custard.
Needs to be cooked properly to avoid a starchy taste.
Arrowroot Powder:
A grain-free, gluten-free alternative to cornstarch.
Creates a slightly lighter, more delicate custard texture.
Blended Cashews or Silken Tofu:
Natural thickeners that contribute to creaminess and structure.
Provide extra richness and a velvety mouthfeel.
Pro Tip: For an extra-smooth consistency, strain the custard mixture through a fine-mesh sieve before pouring it into ramekins.
By following these expert tips, you’ll be able to create a perfectly creamy, plant-based creme brulee with a crisp caramelized topping every time!
Common Mistakes & Troubleshooting
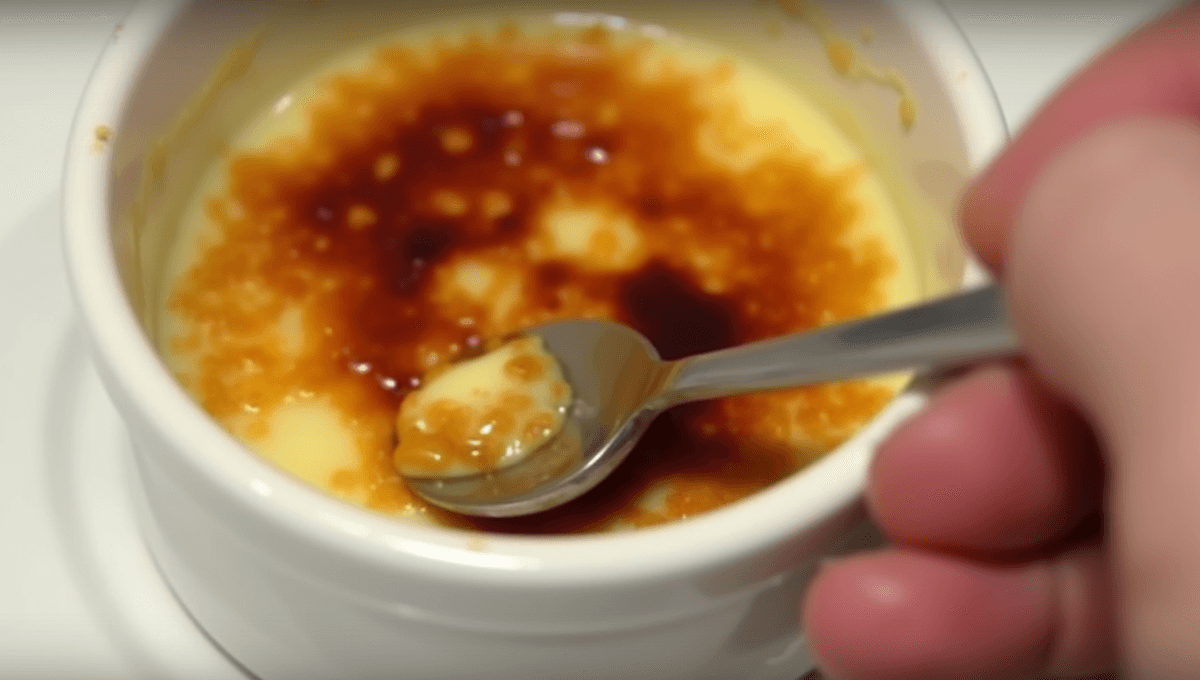
While making vegan creme brulee is a fun and rewarding process, sometimes things don’t go as planned. Whether your custard didn’t set properly or your sugar topping burned, don’t worry—these common mistakes can be easily fixed with a few simple tips. Let’s dive into the most frequent issues and how to troubleshoot them.
1. Why Did My Custard Not Set?
One of the most frustrating issues when making vegan creme brulee is when the custard fails to set properly, leaving you with a runny or watery dessert.
Possible Causes:
Not using a proper thickening agent like agar-agar or cornstarch.
The custard mixture wasn’t heated to the proper temperature.
Not allowing the custard to chill long enough.
Solution:
Agar-Agar or Cornstarch – These are the most reliable plant-based thickeners to ensure your custard sets correctly.
Agar-Agar needs to be heated to a simmer (around 185°F or 85°C) to activate its gelling properties, so make sure to cook it long enough.
If you’re using cornstarch, cook the mixture until it thickens, then allow it to cool before refrigerating.
Pro Tip: If your custard still isn’t setting, you can reheat and add more thickener, being sure to let it simmer for the required time.
2. How to Fix Grainy or Separated Creme Brulee
No one wants a grainy, lumpy texture in their creme brulee, but this can sometimes happen if the mixture isn’t blended properly or if the ingredients are too cold when combined.
Possible Causes:
The mixture wasn’t blended enough, leaving bits of cashew or tofu behind.
The custard separated due to the thickener not being incorporated evenly.
Overheating caused the oils in coconut cream or cashews to separate from the rest of the mixture.
Solution:
Blend thoroughly – Make sure the base is fully smooth before cooking. A high-speed blender works best, but you can also use a hand blender or food processor.
Strain the mixture through a fine-mesh sieve to remove any remaining lumps or bits.
Reheat gently – If you notice separation during the cooking process, stir the mixture constantly and reheat it slowly over low to medium heat.
If the mixture has separated or curdled after cooling, simply blend it again to bring it back to a smooth consistency.
3. Preventing Burnt Sugar Topping
The caramelized sugar topping is one of the highlights of creme brulee, but it’s easy to burn the sugar if you’re not careful.
Possible Causes:
Holding the culinary torch too close to the sugar.
Leaving the sugar under the broiler for too long.
Not evenly distributing the sugar over the surface.
Solution:
Torching the sugar: Hold the culinary torch 3-4 inches away from the surface and keep it moving in small circles to ensure the sugar melts and caramelizes evenly without burning.
Broiling: If you’re using a broiler, set it on the lowest heat and keep a close eye on it. Broil for 1-2 minutes, checking constantly to avoid burning.
Evenly distribute the sugar: Sprinkle a thin, even layer of sugar on top of the custard. Too much sugar can burn quickly, while too little won’t give you that signature crunchy texture.
Pro Tip: If the sugar does burn, it can be hard to fix, so it’s best to keep the torch moving to ensure an even caramelization and avoid burning.
By knowing how to troubleshoot these common mistakes, you can be sure your vegan creme brulee turns out perfectly every time. Whether it’s fixing a runny custard or saving the sugar topping from disaster, these quick fixes will help you get back on track.
FAQs
If you’re making vegan creme brulee for the first time or want to troubleshoot some common concerns, you’re not alone! Here are answers to some of the most frequently asked questions about this delicious dessert.
1. Can I Make Creme Brulee Without a Torch?
While a culinary torch is traditionally used to create that signature crunchy caramelized topping on creme brulee, it’s not the only way to achieve this effect! If you don’t have a torch, you can still make the perfect vegan creme brulee at home.
Alternative Methods:
Broiling: Place your ramekins under a preheated broiler on the top rack for 1-2 minutes. Keep a close eye on them to prevent burning, as the sugar can caramelize quickly under high heat.
Caramelizing with Hot Water: If you don’t have a broiler, you can create a hot water bath by placing your ramekins in a pan of hot water and then sprinkling sugar over the custard. When the water heats the ramekins, the sugar will melt and caramelize.
Pro Tip: Whichever method you use, be sure to evenly distribute the sugar over the surface of the custard for a consistent, perfect caramelized layer.
2. How Long Does Vegan Creme Brulee Last in the Fridge?
Once you’ve made your vegan creme brulee, you’ll want to store it properly to enjoy it later. Fortunately, this dessert can last for several days when stored correctly.
Storage Guidelines:
Refrigerate promptly: After making your creme brulee, allow it to cool to room temperature before covering and placing it in the fridge.
Storage time: Vegan creme brulee can be kept in the fridge for up to 3-4 days. The custard base will stay creamy and fresh as long as it’s properly covered.
Caramelized topping: If you’ve torched the sugar, the caramelized topping will lose its crispy texture over time, so it’s best to torch the sugar just before serving.
Pro Tip: To keep the custard fresh, cover the ramekins with plastic wrap or an airtight lid. Avoid covering the caramelized sugar topping directly to prevent it from becoming soggy.
3. Can I Use Oat Milk Instead of Coconut Milk?
Yes, you can absolutely use oat milk instead of coconut milk in your vegan creme brulee! While coconut milk gives a rich, creamy flavor, oat milk is an excellent alternative that will still create a smooth and luscious custard.
Oat Milk vs. Coconut Milk:
Oat Milk: It’s a great choice if you prefer a more neutral flavor in your custard. It’s naturally creamy and slightly sweet, making it a perfect base for a delicate vegan creme brulee. However, it’s not as rich as coconut milk, so you may need to add a bit more thickener to achieve the desired texture. Pair it with this recipe for chocolate banana egg oatmeal muffins for an oat-inspired treat.
Coconut Milk: Known for its rich and velvety texture, it provides a fuller mouthfeel and a subtle coconut flavor that pairs wonderfully with the vanilla bean in creme brulee.
Pro Tip: If you choose oat milk, consider combining it with coconut cream to get that extra creaminess, while still keeping it dairy-free and delicious!
By answering these common questions, you should feel more confident in making your perfect vegan creme brulee! Whether you’re wondering about torching techniques, storage tips, or ingredient substitutions, we’ve got you covered.
Conclusion
In conclusion, vegan creme brulee is the perfect way to enjoy a classic dessert without compromising on taste or texture. Whether you choose the rich coconut milk creme brulee, the silky smooth cashew-based version, or the protein-packed tofu vanilla creme brulee, there’s a plant-based option to suit every palate. With simple ingredient swaps like maple syrup for sweetness and agar-agar for thickening, you can create a dairy-free custard that’s just as decadent as the traditional one.
We hope this recipe inspires you to try your hand at making your very own vegan creme brulee! We’d love to hear how it turned out—leave a comment or a review below and let us know which twist you tried. Don’t forget to share your creation with friends and family, and enjoy the joy of serving up this indulgent dessert that’s completely plant-based! For more vegan dessert ideas, explore this apple coffee cake recipe or this vegan peanut butter brownies recipe.
Happy baking, and we can’t wait to hear which creme brulee version you loved most!


2 thoughts on “Classic Creme Brulee Recipe: 5 Irresistible Vegan”