
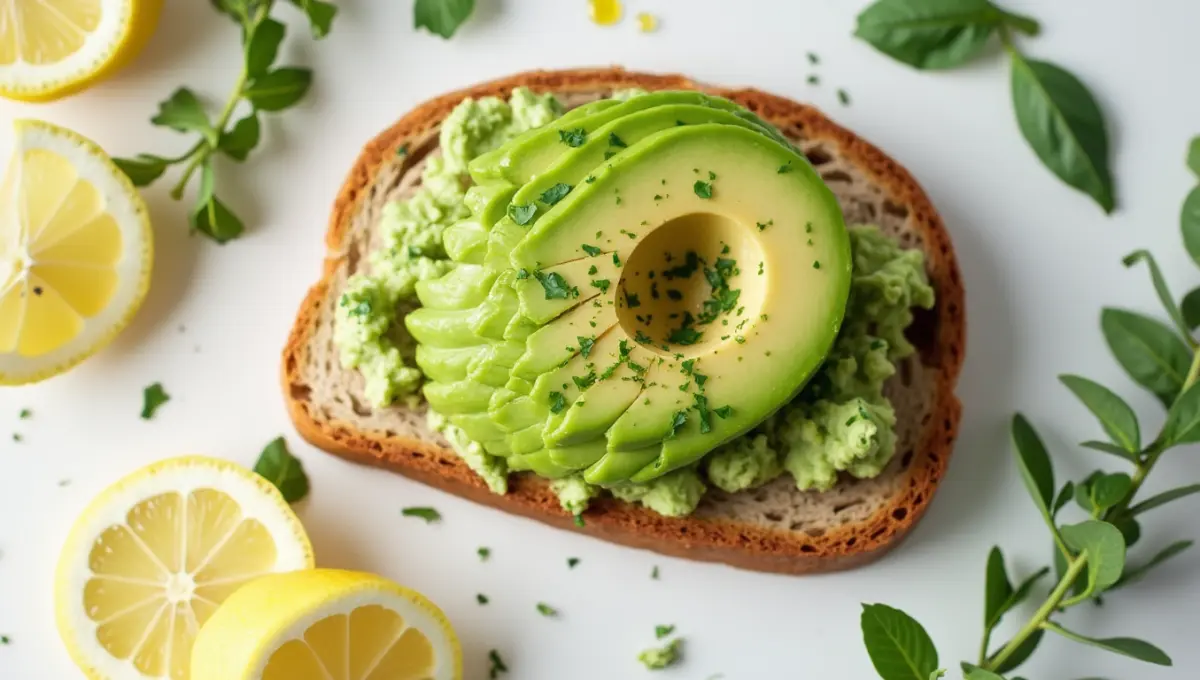
There’s something timeless and satisfying about a fresh, crusty slice of sourdough—especially when it fits perfectly into a plant-based lifestyle. If you’ve been searching for a sourdough bread recipe that’s not only delicious but also 100% vegan, you’re in the right place.
This isn’t just another loaf—it’s a celebration of flavor, texture, and nourishment without any dairy or eggs. Whether you’re new to sourdough or a seasoned baker looking for something fresh, this plant-powered twist on tradition will keep you inspired in the kitchen.
In this post, you’ll discover 10 unique and delicious vegan twists on the classic sourdough recipe. From savory herbs to sweet swirls, each variation is crafted to help you enjoy sourdough in creative, wholesome, and totally satisfying ways.
What Is Sourdough Bread?
At its core, sourdough bread is a naturally leavened bread made without commercial yeast. Instead, it relies on a fermented mixture of flour and water—known as a sourdough starter—which captures wild yeast and beneficial bacteria from the environment. Through a slow fermentation process, these natural microbes help the dough rise, giving sourdough its signature tangy flavor and chewy texture.
One of the unique benefits of using wild yeast and fermentation in a sourdough bread recipe is the depth of flavor that develops over time. Unlike quick-rise breads, sourdough allows enzymes and acids to break down gluten and phytic acid, making it potentially easier to digest and more nutrient-available for the body. This slow process also creates a more complex, hearty loaf that many plant-based eaters find both satisfying and nourishing.
Sourdough has a rich history that spans thousands of years. In fact, it’s considered one of the oldest forms of leavened bread, with roots tracing back to ancient Egypt. A fun fact: during the California Gold Rush, miners often carried their own sourdough starters, earning them the nickname “sourdoughs.” Today, this ancient method continues to gain popularity—especially in the plant-based community—thanks to its simplicity, tradition, and gut-friendly qualities. For another plant-based baking adventure, try this vegan apple coffee cake recipe for a sweet complement to your sourdough.
Whether you’re just discovering the beauty of a good sourdough bread recipe or looking to try new variations, understanding the basics of wild fermentation makes every loaf more meaningful.
Why Sourdough Is Perfect for a Vegan Diet
One of the best things about a classic sourdough bread recipe is that it’s naturally vegan. Traditional sourdough doesn’t rely on any animal-based ingredients—no milk, no butter, and no eggs—making it a perfect fit for plant-based lifestyles. Unlike many conventional bread recipes that include dairy or egg for richness and structure, sourdough achieves its hearty texture and depth of flavor entirely through the fermentation process and time.
That means if you’re following a vegan or plant-based diet, sourdough is one of the most satisfying and authentic ways to enjoy homemade bread. It aligns seamlessly with those looking for egg-free sourdough options and supports a cleaner, more natural ingredient list that fits with most plant-based baking tips. For another vegan-friendly side, consider pairing your loaf with this vegan green bean casserole recipe.
But the benefits go beyond just ingredient simplicity. During the sourdough fermentation process, naturally occurring lactic acid bacteria work alongside wild yeast to help the dough rise and develop flavor. These friendly bacteria not only enhance taste but may also contribute to better gut health. Some studies suggest that the fermentation process can lower gluten levels and make nutrients more bioavailable, which is especially helpful in vegan diets that focus on nutrient absorption and digestive wellness.
Whether you’re making your first sourdough loaf or exploring new plant-based baking tips, choosing a sourdough bread recipe means choosing a wholesome, dairy-free, and completely vegan-friendly option that supports both taste and well-being.
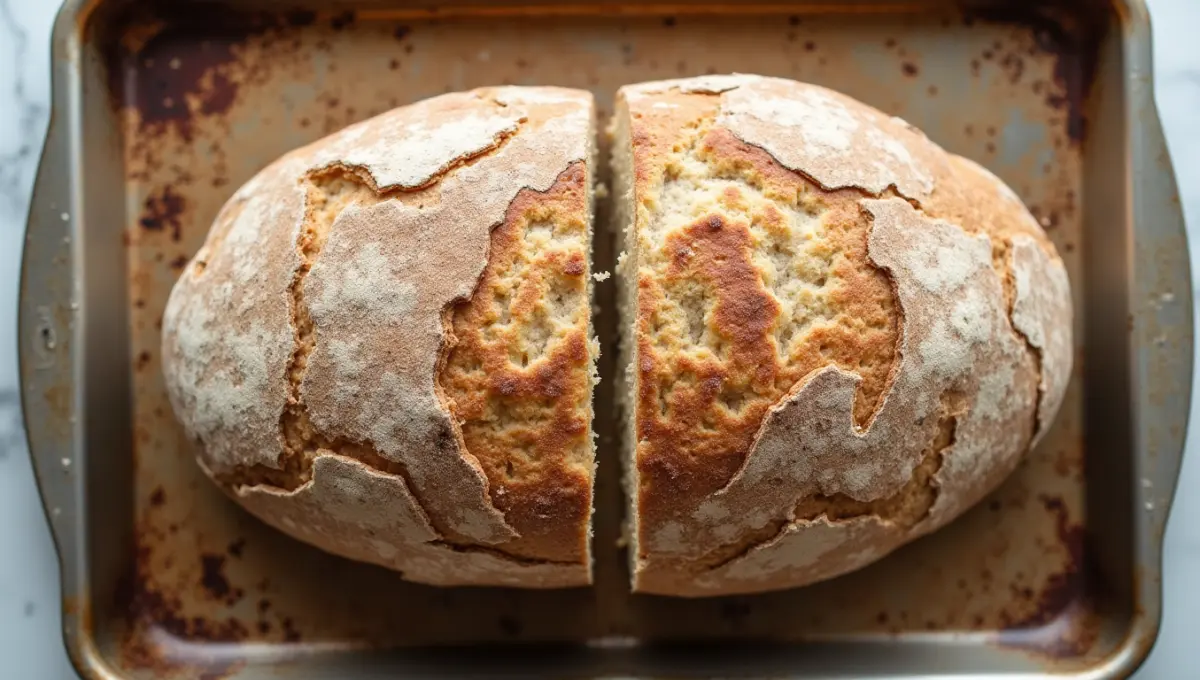
Basic Vegan Sourdough Bread Recipe
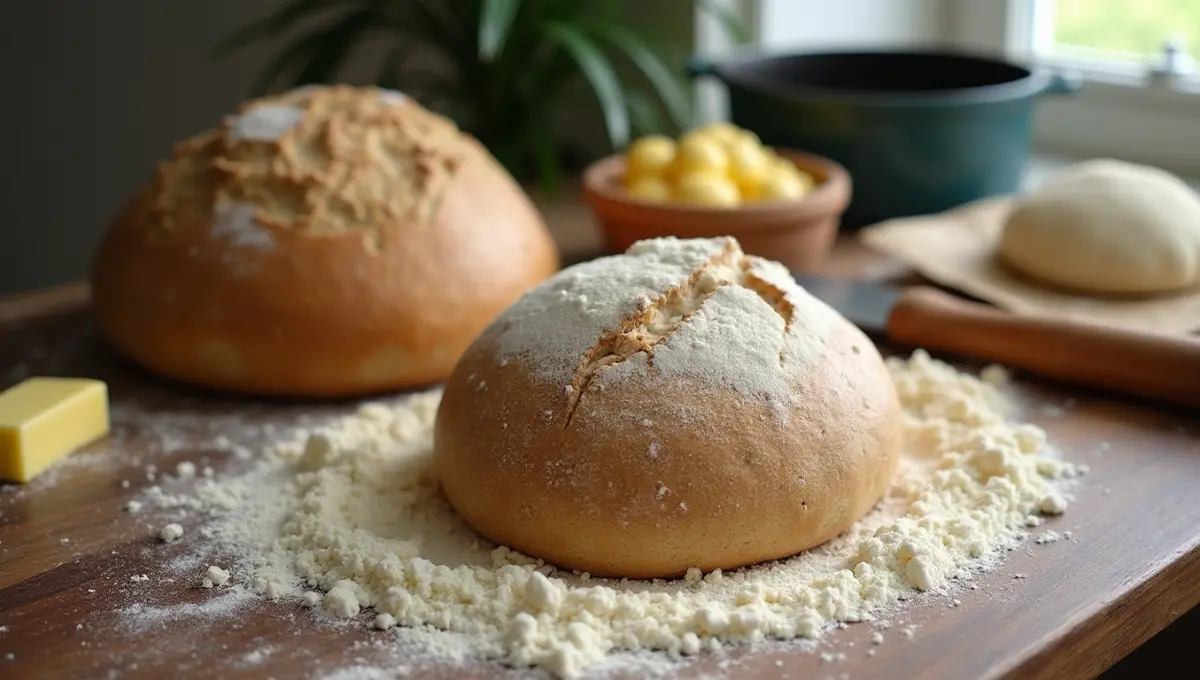
If you’re ready to get hands-on with a simple and rewarding sourdough bread recipe, this vegan-friendly version is the perfect place to start. It uses wholesome, plant-based ingredients and avoids dairy, eggs, and commercial yeast while delivering the tangy flavor and chewy texture that sourdough is known for.
Ingredients
(Makes one medium loaf)
1 cup active sourdough starter (fed and bubbly)
3 cups organic bread flour (or substitute 1 cup with whole wheat flour)
1 1/4 cups filtered water
1 tsp sea salt
1 tbsp olive oil or melted vegan butter (optional, for a softer crust)
Optional: 1 tbsp maple syrup for a hint of sweetness
Optional Add-ins for Variations
Chopped nuts, seeds, herbs, dried fruit, or plant-based cheese shreds
Equipment Needed
Mixing bowl
Bench scraper
- Banneton basket or a clean bowl lined with a towel
- Dutch oven or cast iron pot with lid
Kitchen scale (for best results)
Sharp knife or bread lame (for scoring)
Step-by-Step Instructions
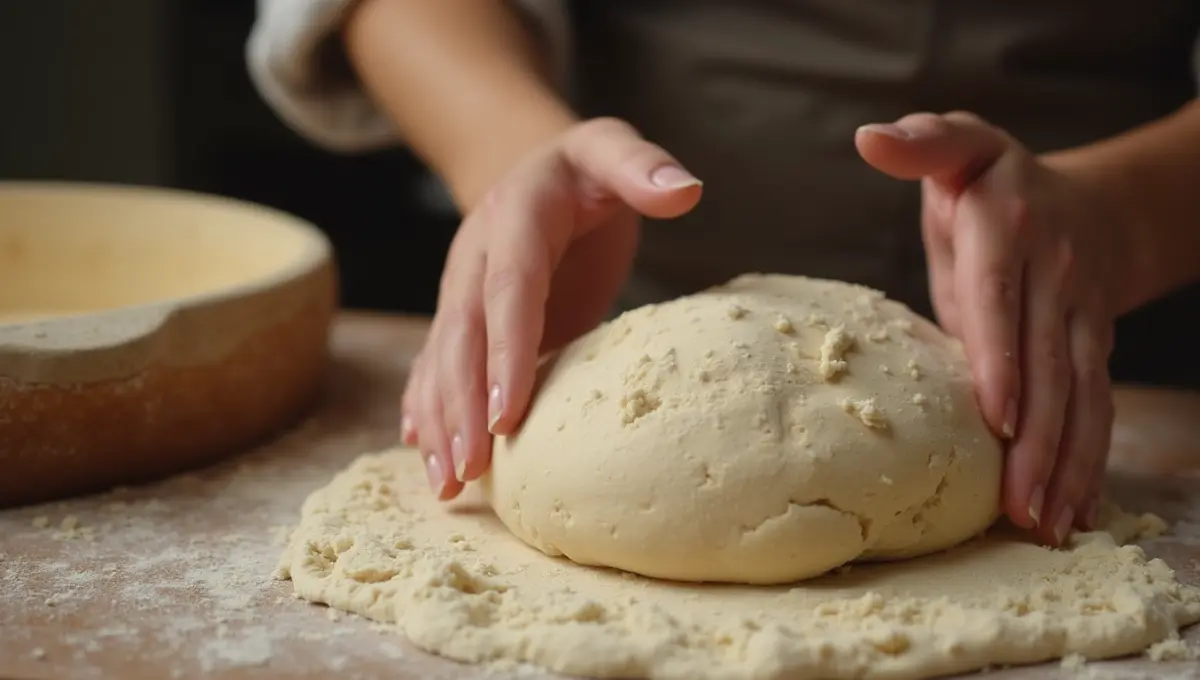
Step 1: Mix the Dough
In a large bowl, combine the sourdough starter and water. Stir until mixed, then add flour and salt. Mix until a shaggy dough forms. If using oil or sweetener, add now.
Step 2: Rest and Stretch
Cover the bowl with a cloth and let it rest for 30 minutes. Perform 3–4 rounds of stretch and folds over the next 2 hours at 30-minute intervals to build strength.
Step 3: Bulk Fermentation
Let the dough ferment at room temperature (around 70°F) for 4–6 hours or until it has doubled in size. Timing may vary based on ambient temperature.
Step 4: Shape and Proof
Lightly flour a surface and shape the dough into a tight round. Place it seam side up into a floured banneton basket. Cover and refrigerate overnight (cold proofing).
Step 5: Bake
Preheat your oven to 475°F (245°C) with your Dutch oven inside. When ready, turn the dough out onto parchment paper, score the top, and transfer it into the hot pot. Bake covered for 20 minutes, then uncovered for another 20–25 minutes or until the crust is golden and crisp.
Step 6: Cool and Enjoy
Let the bread cool completely before slicing to allow the crumb to set properly.
Notes for Substitutions
Whole wheat flour can replace up to 50% of the white flour for a denser, more fiber-rich loaf.
Vegan butter adds richness and softens the crust—optional but recommended.
- Flaxseed egg is not required in this dough, but can be used in add-on recipes like sourdough rolls.
Add-ins like herbs, olives, or raisins can be folded into the dough during the last stretch and fold.
Nutrition Info (per slice, approx. based on 12 slices)
Calories: 140
Protein: 4g
Carbohydrates: 26g
Fiber: 2g
Fat: 2g (with vegan butter)
Sugar: <1g
Sodium: 190mg
This foundational sourdough bread recipe provides the perfect base for countless plant-based variations. Once you’ve mastered the process, you can explore creative ways to add flavor, texture, and personal flair.
10 Delicious Vegan Twists on the Classic Recipe
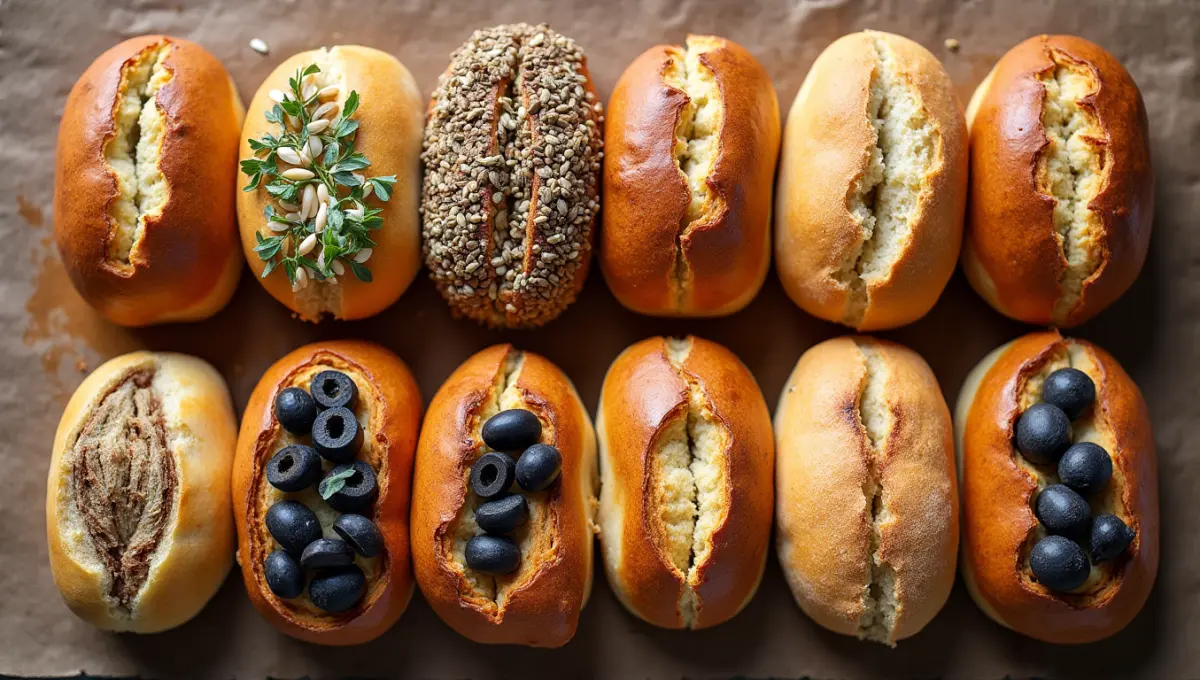
Once you’ve mastered the basic sourdough bread recipe, it’s time to get creative with flavors and textures. These 10 plant-based variations add a personal touch to your loaf while staying true to the simplicity of sourdough. Whether you’re baking for breakfast, a hearty meal, or something in between, each twist offers something special.
1. Whole Grain Boost
A fiber-rich loaf that’s wholesome, dense, and satisfying—perfect for toast or sandwiches.
Ingredients
2 cups bread flour
1 cup whole wheat flour
1 cup active sourdough starter
1 1/4 cups filtered water
1 tsp salt
Instructions
Mix starter, water, and both flours until combined.
Proceed with bulk fermentation, stretch and folds, and proofing.
Bake as in the basic sourdough bread recipe.
2. Seeded Crust
A crust full of flax, sesame, and chia seeds adds a delightful crunch and extra nutrients.
Ingredients
Basic dough from your sourdough bread recipe
2 tbsp flax seeds
2 tbsp sesame seeds
2 tbsp chia seeds
Instructions
Toast seeds lightly, then roll the shaped dough in them before final proofing.
Gently mist dough with water so seeds stick.
Bake as usual.
3. Garlic & Herb Sourdough
A savory loaf bursting with garlic and fragrant herbs—great for soups or dipping.
Ingredients
Basic dough
2 garlic cloves, finely minced
1 tsp dried rosemary
1 tsp thyme
1 tbsp olive oil
Instructions
Fold garlic and herbs into the dough during the second stretch and fold.
Proceed with proofing and bake as per your sourdough bread recipe.
4. Olive & Sundried Tomato Loaf
A Mediterranean-inspired twist that’s rich, salty, and incredibly flavorful.
Ingredients
Basic dough
1/4 cup chopped kalamata olives
1/4 cup chopped sun-dried tomatoes (oil-packed, drained)
1 tsp dried oregano
Instructions
Gently fold olives and tomatoes into dough after first proof.
Shape, proof overnight, and bake the next day.
5. Sweet Cinnamon Raisin Sourdough
A cozy, naturally sweet version that’s ideal for breakfast or snacking.
Ingredients
Basic dough
1 tsp cinnamon
1/3 cup raisins or chopped dates
Optional: 1 tbsp maple syrup for extra sweetness
Instructions
Soak raisins in warm water for 10 minutes, then drain.
Fold cinnamon and raisins into dough after bulk fermentation.
Shape and bake as usual.
6. Vegan Cheese Swirl
A comforting, savory bread with a creamy swirl of plant-based cheese.
Ingredients
Basic dough
1/4 cup cashew cheese or nutritional yeast “cheese” spread
Optional: 1 tsp garlic powder or smoked paprika
Instructions
Roll dough into a rectangle, spread cheese evenly, then roll it up and shape into a round loaf.
Proceed with final proof and bake in Dutch oven.
7. Spelt Flour Mix
For a nuttier flavor and softer crumb, ancient grains like spelt shine in this variation.
Ingredients
2 cups bread flour
1 cup spelt flour
1 cup active starter
1 1/4 cups water
1 tsp salt
Instructions
Mix and knead dough as usual. Spelt ferments faster, so reduce bulk fermentation slightly.
Bake as in basic sourdough bread recipe.
8. Pumpkin Sourdough
A seasonal favorite that’s lightly sweet, moist, and golden orange in color.
Ingredients
Basic dough
1/2 cup pumpkin purée
1 tsp pumpkin spice mix
Optional: 1 tbsp maple syrup
Instructions
Mix pumpkin and spices into the dough at the start.
Reduce water slightly to account for pumpkin’s moisture.
Shape, proof, and bake as usual.
9. Carrot & Walnut Sourdough
A hearty, textured loaf packed with crunch and natural sweetness.
Ingredients
Basic dough
1/2 cup grated carrots
1/4 cup chopped walnuts
1/2 tsp cinnamon or nutmeg
Instructions
Fold carrots and walnuts into the dough during final stretch and fold.
Let rise, shape, and bake per standard sourdough bread recipe.
10. Activated Charcoal Bread
A bold, black sourdough loaf that’s visually dramatic and detox-friendly.
Ingredients
Basic dough
1 tbsp food-grade activated charcoal powder
Optional: sesame seeds for garnish
Instructions
Add charcoal to flour before mixing.
Mix, ferment, and bake as usual.
Garnish with white sesame seeds before baking for contrast.
These unique takes on the classic sourdough bread recipe are perfect for bakers who want variety without compromising on plant-based values. Each one adds character and flavor, turning your loaf into something new and delicious every time.
Pro Tips for Perfect Vegan Sourdough Every Time
Mastering a great sourdough bread recipe takes patience, practice, and a few reliable techniques—especially when you’re keeping it fully plant-based. These expert tips will help you get consistent results with a tender crumb, strong rise, and delicious flavor every time you bake.
1. Understand Hydration Levels
Hydration refers to the ratio of water to flour in your dough. A higher hydration (usually around 75–80%) yields a more open, airy crumb but requires more experience with handling sticky dough. For beginners, starting around 70% hydration offers a balance of structure and softness.
Tip: Adjust hydration based on your flour. Whole wheat or spelt absorbs more water than white bread flour.
2. Nail Your Bulk Fermentation
Bulk fermentation is when your dough first rises after mixing. It’s crucial for building structure and flavor. For a vegan sourdough bread recipe, expect the bulk ferment to last 4–6 hours at room temperature, or longer if your kitchen is cool.
Look for: A dough that has doubled in size, with bubbles forming under the surface and a slight wobble when moved.
3. Use the Cold Proof to Your Advantage
Cold proofing (retarding the dough overnight in the fridge) helps develop flavor and makes the dough easier to handle and score. It also supports gluten development without overproofing.
Tip: Store your shaped dough in a banneton or lined bowl overnight, then bake directly from the fridge for best oven spring.
4. Get Confident with Shaping
Proper shaping ensures your loaf rises upward, not outward. After bulk fermentation, gently fold and shape the dough into a tight ball or batard, creating surface tension without deflating the interior.
Tip: Let the dough rest for 20 minutes before final shaping to relax the gluten.
5. Address Plant-Based Baking Challenges
In traditional baking, ingredients like egg wash are used to create a shiny crust. For a vegan loaf:
Use plant milk (like oat or soy) brushed over the top before baking for a light sheen
Or simply mist with water to boost steam and crust texture
If you’re missing the richness that eggs or dairy provide, incorporating small amounts of olive oil or vegan butter into the dough can soften the crumb and add flavor. For more plant-based sauce ideas to pair with your bread, explore these top plant-based sauces.
6. Use the Right Tools
A few tools can make a big difference when baking your sourdough bread recipe:
Banneton basket: Helps shape and support the dough during the final proof
Dutch oven: Traps steam during baking, leading to a crisp, artisan-style crust
Bread lame or sharp knife: Essential for scoring the loaf before baking, which controls the rise and adds visual appeal
Kitchen scale: For accurate ingredient measurement and better results
By following these tips, your plant-based sourdough bread recipe will be more predictable, flavorful, and bakery-worthy with every bake.
Common Vegan Sourdough Mistakes to Avoid
Even with the best intentions, it’s easy to make a few missteps when baking a sourdough bread recipe, especially a plant-based one. Whether you’re just starting or refining your technique, avoiding these common mistakes can make the difference between a dense loaf and a bakery-quality result.
1. Overproofing the Dough
One of the most frequent issues in sourdough baking is overproofing. This happens when the dough ferments for too long and loses its ability to rise during baking. For vegan bakers, who may already be using slightly denser flours or moisture-rich add-ins, overproofing can lead to a flat, overly sour loaf.
What to do instead: Watch your dough—not the clock. Look for signs of readiness: a smooth surface, visible bubbles, and a gentle spring-back when poked.
2. Using a Weak or Inactive Starter
The strength of your sourdough starter is crucial. A sluggish starter won’t leaven your bread effectively, resulting in poor oven spring and a heavy crumb. Vegan bakers sometimes overlook the importance of maintaining a robust, bubbly culture.
What to do instead: Feed your starter regularly, using equal parts flour and water. Before using it in your sourdough bread recipe, make sure it has doubled in size within 4–6 hours of feeding and passes the float test.
3. Skipping or Rushing Bulk Fermentation
Bulk fermentation is when the dough begins to develop flavor, structure, and strength. Rushing this stage or skipping it entirely can result in a bland, underdeveloped loaf.
What to do instead: Allow enough time—usually several hours depending on room temperature—so your dough becomes airy and elastic. Use stretch-and-fold techniques every 30 minutes to build structure naturally.
4. Not Scoring the Dough Properly
Scoring isn’t just for decoration. Proper scoring helps control how your loaf expands in the oven. Without it, your dough may split unpredictably or fail to rise fully.
What to do instead: Use a sharp lame or knife to make a confident slash just before baking. This guides the oven spring and gives your sourdough bread recipe a professional look.
5. Bonus Tip: Be Mindful of Vegan Ingredients
Sometimes, plant-based substitutions can alter moisture or structure. For example, adding puréed pumpkin or applesauce for richness can increase hydration, affecting proofing and rise.
What to do instead: Adjust your flour or water ratio slightly and note how your dough behaves over time. Baking vegan doesn’t mean compromising on texture—it just means paying attention to how ingredients interact. For another creative plant-based dish, try this vegan pineapple casserole recipe.
By understanding and avoiding these common mistakes, your vegan sourdough bread recipe will rise, taste, and look better. The more you bake, the more you’ll learn how your dough responds—and that’s where the magic happens.
FAQs About Vegan Sourdough Bread
Baking a sourdough bread recipe can come with a lot of questions, especially when you’re creating it the vegan way. Whether you’re curious about storage, freezing, or adapting the recipe for gluten-free diets, here are some frequently asked questions that will help you perfect your loaf every time.
1. Can I Freeze Sourdough Bread?
Yes, you can absolutely freeze sourdough bread to enjoy later! Freezing is a great way to preserve freshness, especially if you’ve baked a large batch or want to keep some loaves for future meals.
How to freeze:
Allow your bread to cool completely after baking.
Slice the bread before freezing if you plan to use individual slices.
Wrap the loaf or slices tightly in plastic wrap or foil, then place in a resealable freezer bag or airtight container.
To thaw, remove the bread from the freezer and let it sit at room temperature, or toast individual slices straight from the freezer.
Freezing doesn’t compromise the tangy flavor of your sourdough bread recipe, though the texture may change slightly when reheated.
2. How Do I Store My Vegan Sourdough?
Proper storage is essential to keeping your sourdough bread fresh for as long as possible. Vegan sourdough, like its traditional counterpart, benefits from being stored in a breathable environment to avoid moisture buildup.
How to store:
If you plan to eat your bread within a few days, store it in a paper bag or a breadbox at room temperature.
For longer storage, place the bread in a cotton bag or wrap it in a clean towel. Avoid plastic bags as they can make the crust soggy.
Alternatively, you can store the bread in the fridge for up to a week, but it may lose some of its crispy texture.
Keep in mind that sourdough is best enjoyed fresh, but storing it properly helps preserve its flavor and texture.
3. Can I Make Gluten-Free Vegan Sourdough?
Making gluten-free sourdough bread is definitely possible, but it requires a different approach than traditional wheat-based sourdough. Since gluten is essential for structure and rise, gluten-free flours behave differently, and you’ll need to adjust your ingredients and techniques accordingly.
How to make it:
Gluten-free flour blend: Use a gluten-free flour blend that includes a variety of flours (e.g., rice flour, sorghum, and potato starch) for the best texture. You can also add xanthan gum or psyllium husk to mimic the texture gluten provides.
Vegan starter: Ensure your starter is made with a gluten-free flour, as a regular wheat-based starter won’t work for gluten-free baking.
Hydration: Gluten-free dough typically requires more water, as these flours absorb more liquid than wheat flours.
Fermentation time: Gluten-free sourdough may need a longer fermentation time. Keep an eye on the dough to ensure it’s fermenting properly.
While gluten-free sourdough takes a bit more trial and error, the result is a delicious, tangy bread that’s both vegan and gluten-free. For another gluten-free treat, try this gluten-free sugar cookie recipe.
By addressing these common questions, you can confidently bake and store your vegan sourdough bread recipe without any worry. Whether you’re freezing, storing, or experimenting with gluten-free alternatives, these tips will help you enjoy your sourdough at its best.
Conclusion
Baking a sourdough bread recipe with a plant-based twist brings both nutritional benefits and delicious flavor to your kitchen. Vegan sourdough is not only dairy and egg-free, making it perfect for those following plant-based diets, but it also offers a wealth of health benefits. The natural fermentation process promotes better digestion, supports gut health with beneficial bacteria, and provides a satisfying, hearty loaf that is free from unnecessary additives.
Now that you’ve learned the basics of baking vegan sourdough, why not take it a step further and try one of the exciting twists we’ve shared? From whole grain boosts to sweet cinnamon raisin variations, there’s a vegan sourdough option for every taste. Experiment with these unique twists and share your results with us—whether you’re baking for yourself, family, or friends, the possibilities are endless.
We’d love to hear about your vegan sourdough adventures! Leave a comment below with your favorite twist or any questions you may have. If you’re enjoying these plant-based baking tips, don’t forget to subscribe for more recipes and baking advice straight to your inbox. For a sweet finish to your baking day, whip up this vegan peanut butter brownies recipe. Happy baking, and enjoy your homemade sourdough bread recipe!
4 thoughts on “Sourdough Bread Recipe: 10 Delicious Vegan Twists Now”