
Craving Nestle Chocolate Chip Cookies but follow a plant-based diet? You’re not alone! Nestlé Toll House cookies are a timeless classic, but their traditional recipe is packed with dairy, eggs, and processed ingredients that don’t always fit into a health-conscious lifestyle. That’s why I’ve created a plant-based cookie recipe that lets you enjoy the same nostalgic flavor—without compromising your values or wellness goals.
In this post, I’ll show you how to recreate the magic of Nestle Chocolate Chip Cookies using vegan-friendly ingredients and 5 healthy vegan tricks that make every bite soft, chewy, and completely guilt-free. Whether you’re a seasoned vegan or just experimenting with dairy-free baking, these vegan Nestle cookies are a must-try. Want more plant-based baking inspiration? Check out our vegan peanut butter brownies for another indulgent treat!
Ready to transform your sweet tooth with a batch of healthy vegan chocolate chip cookies? Let’s get baking!
Why Go Vegan with Nestle Cookies?
Ingredients (with Vegan Swaps)
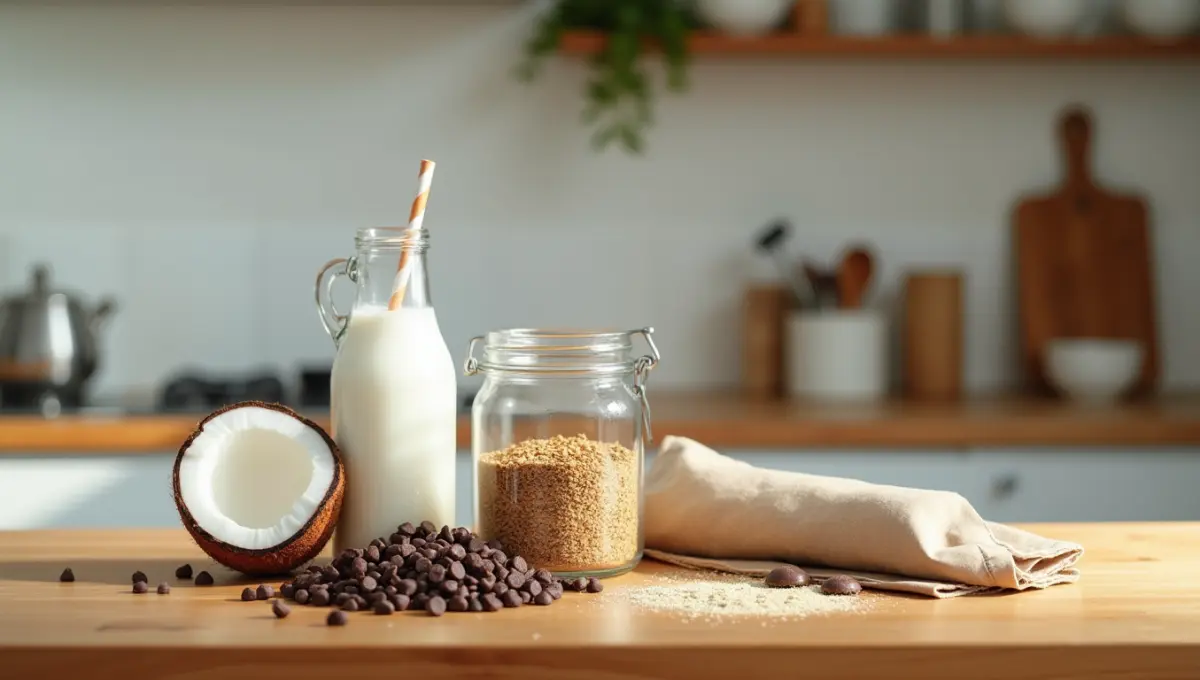
To make these Nestle Chocolate Chip Cookies fit seamlessly into a plant-based lifestyle, we’re using simple ingredient swaps that keep the flavor and texture intact—while making them completely dairy- and egg-free. Here’s what you’ll need, along with the vegan-friendly substitutes that make this recipe both delicious and wholesome:
Butter → Swap with coconut oil or vegan butter (e.g., Earth Balance) for the same rich texture. Need a high-quality vegan butter? Try Earth Balance Vegan Buttery Sticks for perfect baking results.
Eggs → Replace with a flax egg (1 tablespoon ground flaxseed + 3 tablespoons water) for structure and moisture
Nestle semi-sweet chips → Use vegan chocolate chips (e.g., Hu) to keep it dairy-free
Milk → Substitute with almond milk or oat milk for a creamy, neutral flavor
White flour → Optionally replace with almond flour or oat flour for a healthier, whole-food twist. Curious about gluten-free baking? Explore our best gluten-free sugar cookie recipe for more ideas.
These easy swaps allow you to enjoy the classic taste of Nestle Chocolate Chip Cookies while sticking to your plant-based goals.
Instructions: Step-by-Step (with Tips)

Follow these simple steps to make your own delicious, plant-based version of Nestle Chocolate Chip Cookies. This beginner-friendly method ensures soft, chewy results every time, using wholesome vegan swaps that are easy to find.
1. Preheat your oven to 350°F (175°C)
Set your oven so it’s fully preheated by the time your dough is ready. This ensures even baking and helps the cookies set properly from the start.
2. Prepare your flax egg
In a small bowl, mix 1 tablespoon of ground flaxseed with 3 tablespoons of water. Let it sit for at least 5 minutes to thicken. This acts as a vegan binder, replacing a traditional egg.
3. Cream the coconut oil and sugars
In a large mixing bowl, beat together softened coconut oil and your choice of sugar (brown sugar works great). Creaming adds air into the mixture and gives your cookies a light texture.
4. Add the wet ingredients
Mix in the flax egg, vanilla extract, and almond milk (or oat milk). Stir until well combined. This step helps bind everything together and builds the cookie’s rich flavor base.
5. Fold in the dry ingredients and vegan chocolate chips
Gradually add in the flour, baking soda, and salt. Stir just until combined, then fold in the vegan chocolate chips (such as Hu or Enjoy Life). The dough should be slightly sticky but hold its shape.
6. Scoop and bake your cookies
Use a spoon or cookie scoop to drop dough onto a parchment-lined baking sheet. Leave space between cookies as they will spread slightly. Bake for 10–12 minutes or until the edges are golden. For perfectly shaped cookies, grab a cookie scoop set to make portioning a breeze.
7. Cool before serving
Let the cookies cool on the baking sheet for 5 minutes before transferring them to a wire rack. This helps them firm up while staying chewy in the center.
With these easy steps, you’ll enjoy a homemade batch of Nestle Chocolate Chip Cookies that are plant-based, dairy-free, and full of chocolatey goodness. For another classic baked good, try our vegan banana bread recipe with cake mix for a quick twist!
5 Healthy Vegan Tricks to Perfect Nestle Cookies

Want to take your Nestle Chocolate Chip Cookies to the next level—while keeping them fully plant-based? These five simple vegan tricks make all the difference in texture, taste, and nutrition. Whether you’re new to dairy-free baking or a seasoned pro, these swaps are game changers.
1. Use a Flax Egg Instead of Regular Eggs
Replacing eggs with a flax egg (1 tablespoon flaxseed + 3 tablespoons water) adds fiber and healthy fats, while still binding your dough effectively. This simple vegan swap ensures your Nestle Chocolate Chip Cookies hold their shape without needing animal products.
2. Swap Dairy Butter for Vegan Alternatives
Traditional recipes call for butter, but using coconut oil or vegan butter (like Earth Balance) gives your cookies the same rich flavor and chewy texture. It’s a smart way to stick to a plant-based diet without sacrificing indulgence.
3. Choose Quality Vegan Chocolate Chips
Not all chocolate chips are dairy-free. Brands like Hu or Enjoy Life make vegan chocolate chips that melt smoothly and taste just like the original. Swapping these in keeps your Nestle Chocolate Chip Cookies true to their chocolatey reputation—minus the dairy.
4. Add Almond or Oat Milk for Moisture
Instead of cow’s milk, go for almond milk or oat milk to add moisture and subtle flavor. These dairy alternatives help create a smooth dough that bakes into perfectly soft cookies every time. Want to experiment with plant-based milks in other recipes? Try our vegan mulled apple cider recipe for a cozy drink.
5. Opt for Whole-Food Flours When Possible
Consider using almond flour or oat flour in place of white flour to boost fiber and nutrients. These flours still deliver the structure your Nestle Chocolate Chip Cookies need, while making each bite just a bit more wholesome.
Storage & Freezing Tips

Storing and freezing your Nestle Chocolate Chip Cookies properly ensures they stay fresh and delicious for longer. Whether you’ve baked a big batch or want to save some dough for later, these tips will keep your cookies tasting their best.
1. How Long Do Nestle Chocolate Chip Cookies Last at Room Temperature?
Once baked, your homemade vegan cookies will stay fresh for about 4–5 days at room temperature. To keep them soft and chewy, store them in an airtight container. If you live in a humid environment, consider placing a small piece of parchment paper between layers of cookies to absorb moisture and prevent sogginess.
2. Freezing Dairy-Free Cookie Dough
You can freeze the dough to bake fresh cookies at a later time. Roll the dough into individual cookie balls and place them on a baking sheet lined with parchment paper. Freeze them for about 2 hours, then transfer the dough balls to a freezer-safe bag or container. When you’re ready to bake, simply place them on a baking sheet and add a few extra minutes to the baking time.
3. Freezing Baked Nestle Chocolate Chip Cookies
For longer storage, freeze baked cookies for up to 3 months. Let them cool completely, then wrap each cookie individually in plastic wrap or place them in a zip-top freezer bag. To thaw, leave them at room temperature for about 30 minutes, or microwave them for 15–20 seconds for a freshly-baked taste.
4. Reheating Without Drying Out
To reheat cookies without drying them out, wrap them in a damp paper towel and microwave for 10–15 seconds. Alternatively, you can warm them in the oven at 300°F (150°C) for about 5 minutes, which will bring back that soft, fresh-baked texture—perfect for enjoying your dairy-free cookie dough later. Looking for more vegan baking storage tips? Check out our vegan snickerdoodle recipe for similar advice.
These storage and freezing tips will help you enjoy your Nestle Chocolate Chip Cookies for longer and ensure they always taste as good as the first bite!
FAQs
These frequently asked questions will help clear up any doubts and ensure your Nestle Chocolate Chip Cookies turn out perfectly every time. Whether you’re new to vegan baking or just need a few tips, we’ve got you covered!
1. Can I Use Oat Flour Instead of White Flour?
Yes, you can substitute oat flour for white flour in Nestle Chocolate Chip Cookies. It adds a slightly nutty flavor and increases the fiber content. However, since oat flour is softer, you may need to use a little less or combine it with another flour, like almond flour, to maintain the proper texture.
2. What Are the Best Vegan Chocolate Chips for Cookies?
For the best results in your dairy-free cookie dough, use high-quality vegan chocolate chips. Brands like Hu, Enjoy Life, and Lily’s make great options that melt beautifully and offer rich, creamy flavor without dairy. These chips are specifically crafted for vegan baking and provide the best taste and texture for your cookies.
3. How Do I Prevent My Vegan Cookies from Becoming Too Flat?
To prevent your Nestle Chocolate Chip Cookies from spreading too much and becoming too flat, chill the dough for at least 30 minutes before baking. Additionally, make sure you’re using the right balance of wet and dry ingredients. If your dough feels too soft, adding a bit more flour can help achieve the perfect consistency.
4. Can I Use Applesauce Instead of Flax Egg?
Yes, you can use applesauce as a substitute for a flax egg, though the texture might be slightly different. Use 1/4 cup of unsweetened applesauce to replace one flax egg in your Nestle Chocolate Chip Cookies. The applesauce will add a hint of sweetness and moisture, though the flax egg helps with structure and binding, which applesauce may not do as effectively. For more apple-inspired desserts, try our vegan apple coffee cake recipe.
These FAQs should help guide your baking process and make sure your Nestle Chocolate Chip Cookies are just the way you want them—delicious, plant-based, and perfectly chewy!
Conclusion
There you have it—an easy, delicious way to enjoy Nestle Chocolate Chip Cookies with a plant-based twist! This vegan version delivers the same nostalgic taste and soft, chewy texture you love, but with healthier, cruelty-free swaps. Whether you’re making a batch for a special occasion or just craving a sweet treat, these cookies will satisfy your sweet tooth without compromising your values. For more plant-based comfort food, explore our vegan baked mac and cheese recipe for a savory twist.
We’d love to hear from you! What’s your favorite swap for making cookies healthier? Have you tried any other vegan tricks that worked well in this recipe? Drop a comment below and share your baking tips with us!
Thank you for stopping by, and be sure to come back for more creative, plant-based recipes at Toss Recipes. Happy baking!
1 thought on “Nestle Chocolate Chip Cookies Recipe: 5 Healthy Vegan Tricks”