
Table of Contents
ToggleIf you think BBQ is just for meat lovers, think again! Traeger recipes are revolutionizing the way we grill, making it easier than ever to create vegan smoked dishes that are bursting with flavor. Traeger Grills, known for their wood pellet technology, provide a natural, smoky taste that enhances plant-based ingredients like tofu, jackfruit, and mushrooms.
Smoking plant-based foods on a Traeger not only adds a deep, rich flavor but also creates a satisfying texture that mimics traditional BBQ. Plus, vegan BBQ is packed with nutrients, fiber, and antioxidants, making it a heart-healthy and cruelty-free alternative to traditional grilling. As more people seek the best meatless grill recipes, plant-based BBQ is gaining popularity for its bold flavors and environmental benefits.
In this guide, we’ll explore 10 incredible smoked vegan dishes that will take your Traeger grilling to the next level!
Why Use a Traeger Grill for Vegan Cooking?
Traeger Wood Pellet Grills: How They Work
Unlike traditional gas or charcoal grills, Traeger Grills use wood pellets as fuel, offering a unique smoky flavor that enhances plant-based ingredients. These wood pellet smokers operate with a digital temperature control system, ensuring even heat distribution and precision cooking. The pellets—made from compressed hardwoods like hickory, mesquite, and applewood—burn slowly, infusing food with a deep, natural smokiness without overpowering the delicate flavors of vegetables and plant-based proteins.
The Benefits of Smoking Vegan Foods on a Traeger
1. Infuses Bold, Natural Smoky Flavor
One of the biggest challenges in plant-based cooking is replicating the umami depth of grilled meats. Smoking vegetables, tofu, and plant-based proteins on a Traeger gives them a robust, fire-kissed flavor without artificial additives. Using different wood pellets like hickory (strong smoky taste), mesquite (bold and earthy), and applewood (mildly sweet) allows you to customize the flavor profile of your dishes.
2. Creates a Meaty Texture Without Meat
A Traeger grill can transform the texture of plant-based ingredients. For example, smoking tofu at low temperatures removes excess moisture, making it chewier and more satisfying. Likewise, jackfruit, seitan, and mushrooms develop a slightly crispy exterior while staying tender inside, mimicking the texture of smoked meats.
3. Enhances Nutrient Retention
Unlike deep-frying or heavy oil-based cooking, smoking is a low-fat, nutrient-preserving method of cooking. Vegetables like bell peppers, zucchini, and eggplant retain more vitamins and minerals when grilled on a wood pellet smoker compared to traditional frying.
4. Perfect for Meal Prep and Batch Cooking
With these benefits, it’s clear that Traeger Grills are a game-changer for plant-based BBQ lovers. Whether you’re smoking tofu, vegetables, or plant-based meats, the depth of flavor and texture transformation will elevate your vegan grilling experience!
Essential Ingredients & Tools for Vegan Smoking
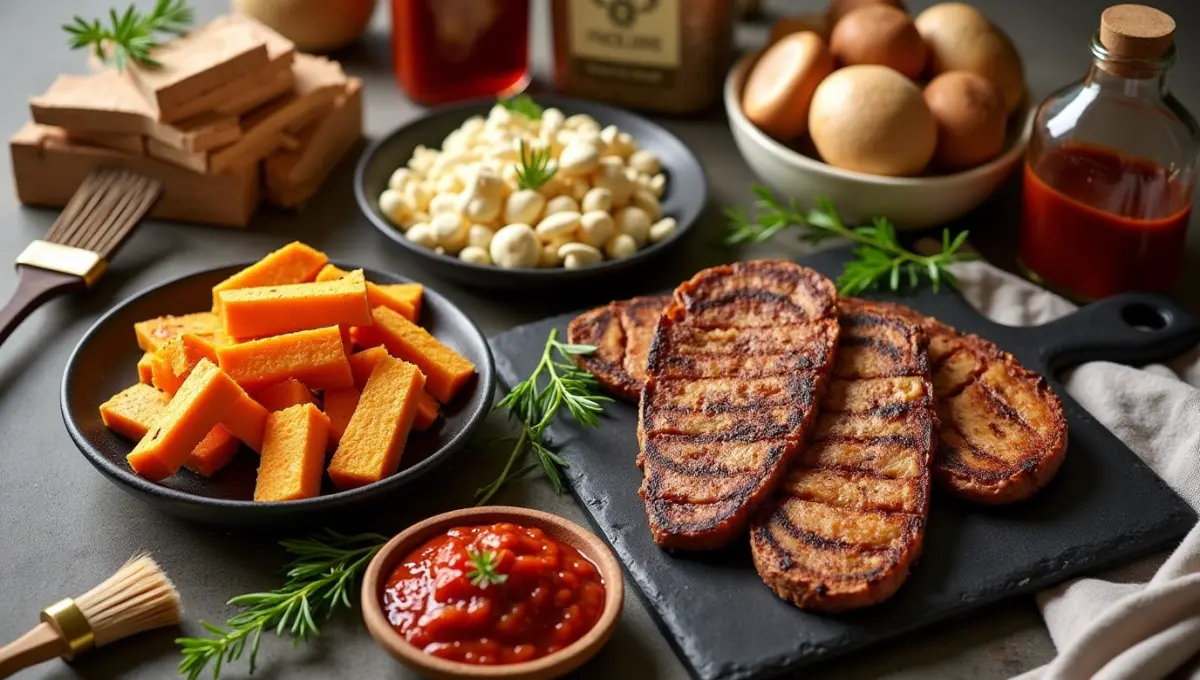
Key Ingredients for Vegan Smoking
To create delicious, smoky plant-based BBQ, start with ingredients that absorb marinades well and develop rich flavors when exposed to smoke.
1. Oyster Mushrooms – A Flavorful and Meaty Alternative
2. Mushrooms – Rich, Umami-Packed and Smoky
Portobello and king oyster mushrooms are fantastic for grilling and smoking because of their dense texture and ability to absorb marinades. Hickory or mesquite wood pellets enhance their natural umami flavor, making them perfect for vegan “steaks” or smoked mushroom tacos.
3. Tofu – The Ultimate Protein for Absorbing Smoky Flavors
Smoking tofu on a Traeger grill transforms its texture, making it firmer with a lightly crisp exterior. A marinade with liquid smoke, smoked paprika, and BBQ seasoning gives it a deep, fire-kissed taste, making it ideal for BBQ tofu steaks or sandwiches.
4. Seitan – A High-Protein, Smoky Meat Substitute
Seitan, also known as wheat gluten, has a chewy, meat-like texture that works great for smoked ribs, sausages, and brisket-style dishes. It pairs well with hickory wood pellets for a bold smoky flavor and benefits from a rich BBQ dry rub.
5. Tempeh – Smoky, Nutty, and Protein-Packed
Tempeh’s firm texture makes it ideal for grilling and smoking. It absorbs marinades well, especially when infused with liquid smoke and mesquite wood pellets, giving it a deep, nutty flavor with a touch of smokiness.
Recommended Seasonings for Vegan BBQ
The right seasonings and marinades are essential to achieving an authentic BBQ flavor in plant-based grilling.
- BBQ Dry Rubs – A mix of smoked paprika, garlic powder, onion powder, brown sugar, salt, and cayenne pepper enhances the depth of flavor in smoked tofu, jackfruit, and seitan.
- Smoked Paprika – A must-have spice for vegan smoking, it adds a natural smoky depth to rubs and marinades.
- Liquid Smoke – This powerful ingredient infuses tofu, tempeh, and jackfruit with an instant smoky taste, even before they hit the grill.
- Marinades – Combining ingredients like soy sauce, balsamic vinegar, maple syrup, mustard, and Worcestershire sauce (vegan version) can enhance smokiness and depth.
Best Wood Pellets for Vegan Smoking
Different smoking wood types bring unique flavors to plant-based foods. Here’s how to choose the best wood pellets for your vegan BBQ:
- Hickory – Best for bold, smoky flavors; great for seitan ribs and smoked tofu.
- Mesquite – Adds an earthy, strong smoke; ideal for mushrooms and tempeh.
- Applewood – Provides a mild, slightly sweet smoke; perfect for jackfruit and smoked sweet potatoes.
10 Best-Smoked Vegan Dishes for Your Traeger
1. Smoked Jackfruit
A smoky, tender, and flavorful jackfruit dish.
Ingredients:
2 cans young jackfruit (drained and shredded)
1 tbsp olive oil
1 cup BBQ sauce
1 tbsp smoked paprika
1 tsp garlic powder
1 tsp onion powder
1 tsp liquid smoke
½ tsp black pepper
Hickory or mesquite wood pellets
How to Make It:
Preheat your Traeger grill to 225°F.
Toss shredded jackfruit in olive oil, smoked paprika, garlic powder, onion powder, black pepper, and liquid smoke.
Spread the jackfruit on a grill-safe pan and smoke for 1 hour, stirring occasionally.
Mix in BBQ sauce and continue smoking for another 30 minutes.
- Serve on a bun with coleslaw or over plant-based rice.
2. Traeger Smoked BBQ Tofu
Smoked tofu with a meaty texture and bold BBQ flavor.
Ingredients:
1 block extra-firm tofu (pressed and sliced)
¼ cup soy sauce
1 tbsp apple cider vinegar
1 tbsp maple syrup
1 tbsp smoked paprika
1 tsp garlic powder
1 tsp liquid smoke
½ tsp black pepper
Applewood or hickory wood pellets
How to Make It:
In a bowl, whisk together soy sauce, vinegar, maple syrup, smoked paprika, garlic powder, liquid smoke, and black pepper.
Marinate tofu for at least 30 minutes.
Preheat Traeger grill to 225°F and place tofu slices directly on the grates.
Smoke for 1 hour, flipping halfway through.
Brush with additional BBQ sauce and grill for 5 more minutes.
3. Grilled & Smoked Portobello Steaks
Juicy, smoky mushroom steaks packed with umami flavor.
Ingredients:
4 large portobello mushrooms
¼ cup balsamic vinegar
2 tbsp olive oil
1 tbsp soy sauce
1 tsp smoked paprika
1 tsp garlic powder
½ tsp black pepper
Hickory or mesquite wood pellets
How to Make It:
Remove mushroom stems and marinate in balsamic vinegar, olive oil, soy sauce, smoked paprika, garlic powder, and black pepper for 30 minutes.
Preheat Traeger to 250°F.
Smoke mushrooms for 45 minutes, flipping halfway through.
Sear over high heat for 2-3 minutes per side.
4. Smoky Seitan Ribs
A chewy, smoky, and flavorful plant-based rib alternative.
Ingredients:
2 cups vital wheat gluten
½ cup chickpea flour
1 cup vegetable broth
¼ cup soy sauce
1 tbsp smoked paprika
1 tbsp garlic powder
1 tsp black pepper
1 cup BBQ sauce
Hickory or mesquite wood pellets
How to Make It:
Mix all dry ingredients, then add vegetable broth and soy sauce. Knead into a dough.
Shape into a rectangle and cut into rib-like strips.
Smoke at 225°F for 1 hour.
Brush with BBQ sauce and grill for 5 minutes.
5. Smoked Cauliflower “Brisket”
A hearty, smoky alternative to beef brisket.
Ingredients:
1 whole cauliflower
2 tbsp olive oil
1 tbsp smoked paprika
1 tbsp garlic powder
1 tsp black pepper
1 cup BBQ sauce
Applewood or hickory wood pellets
How to Make It:
Rub cauliflower with olive oil, smoked paprika, garlic powder, and black pepper.
Smoke at 250°F for 1.5 hours.
Brush with BBQ sauce and smoke for 30 more minutes.
6. Vegan Smoked Mac & Cheese
Creamy, cheesy mac with a smoky twist.
Ingredients:
1 lb elbow pasta
2 cups cashews (soaked)
1 cup plant-based milk
¼ cup nutritional yeast
1 tbsp smoked paprika
1 tsp garlic powder
1 tsp liquid smoke
1 tsp salt
Applewood wood pellets
How to Make It:
Cook pasta according to package instructions.
Blend cashews, milk, nutritional yeast, smoked paprika, garlic powder, liquid smoke, and salt into a smooth sauce.
Mix sauce with pasta and place in a grill-safe dish.
Smoke at 225°F for 30 minutes.
7. Smoked Eggplant Bacon
Crispy, smoky plant-based bacon.
Ingredients:
1 large eggplant (thinly sliced)
¼ cup soy sauce
1 tbsp maple syrup
1 tsp liquid smoke
1 tsp smoked paprika
½ tsp black pepper
Mesquite or hickory wood pellets
How to Make It:
Marinate eggplant slices in soy sauce, maple syrup, liquid smoke, paprika, and pepper for 20 minutes.
Smoke at 200°F for 1 hour.
Bake at 300°F for 10 minutes for crispiness.
8. Smoked Sweet Potatoes with Maple Glaze
Sweet and smoky perfection.
Ingredients:
2 large sweet potatoes (sliced)
2 tbsp olive oil
2 tbsp maple syrup
1 tsp cinnamon
½ tsp smoked paprika
Applewood wood pellets
How to Make It:
Toss sweet potatoes in oil, maple syrup, cinnamon, and paprika.
Smoke at 225°F for 1.5 hours.
9. BBQ Smoked Chickpea Patties
High-protein, smoky burger patties.
Ingredients:
1 can chickpeas (drained)
½ cup breadcrumbs
¼ cup BBQ sauce
1 tsp smoked paprika
½ tsp black pepper
Mesquite or hickory wood pellets
How to Make It:
Mash chickpeas and mix with breadcrumbs, BBQ sauce, paprika, and pepper.
Shape into patties and smoke at 250°F for 1 hour.
10. Smoked Vegan Sausages
Homemade, smoky, and meaty vegan sausages.
Ingredients:
1 cup vital wheat gluten
¼ cup chickpea flour
½ cup vegetable broth
2 tbsp soy sauce
1 tbsp smoked paprika
1 tsp garlic powder
½ tsp black pepper
Hickory wood pellets
How to Make It:
Mix all ingredients and knead into a dough.
Shape into sausage links and wrap in foil.
Smoke at 225°F for 1.5 hours.
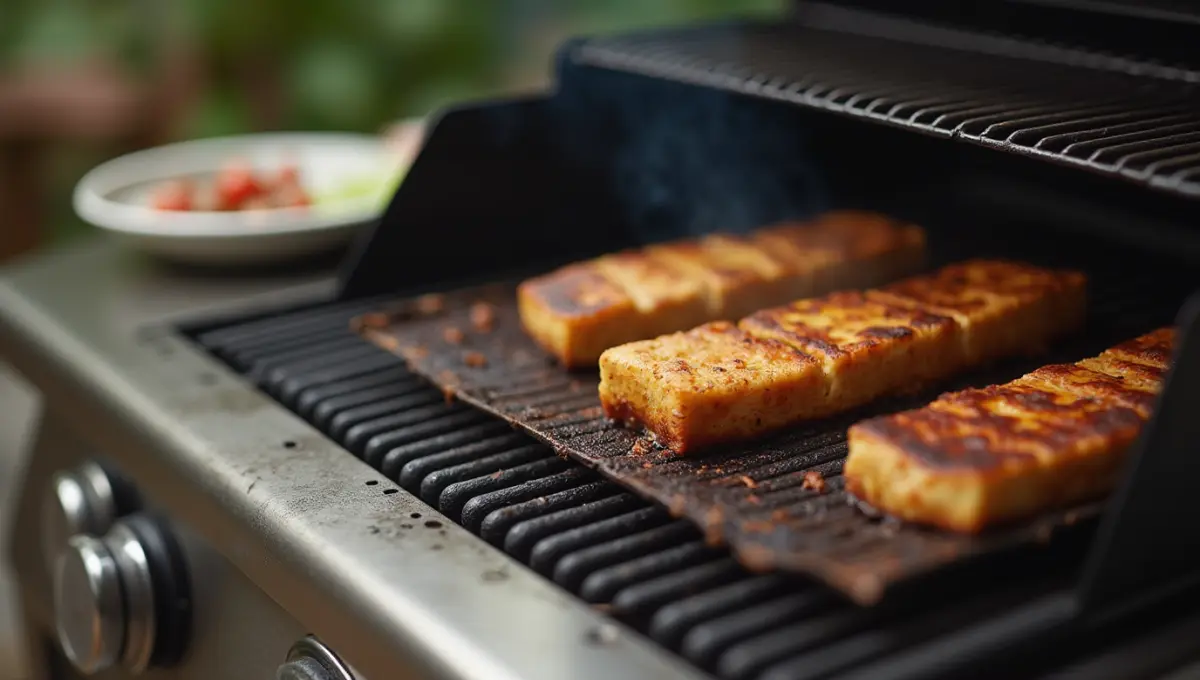
Pro Tips for Smoking Plant-Based Foods on a Traeger

Smoking plant-based foods on a Traeger grill requires a balance of temperature control, smoke infusion, and the right wood pellet selection. Unlike meat, plant-based ingredients have a different moisture content and structure, meaning they absorb smoke faster and cook differently. Mastering these vegan BBQ tips will help you achieve the best flavors and textures without overcooking.
1. Best Temperatures for Smoking Plant-Based Foods
Maintaining the right temperature is crucial when smoking vegetables on a Traeger or preparing plant-based proteins like tofu, tempeh, and seitan. Since these ingredients are more delicate than meat, lower temperatures work best to infuse flavor without drying them out.
200–225°F (Low & Slow Smoking)
Ideal for jackfruit, tofu, seitan, tempeh, and portobello mushrooms
Slowly develops a rich smoky flavor
Prevents drying out while allowing enough time for smoke absorption
250–275°F (Moderate Smoking & Grilling)
Best for denser vegetables like cauliflower, sweet potatoes, and eggplant
Enhances texture while keeping a slight bite
Works well when adding a glaze or sauce during the last 30 minutes
300°F+ (High Heat for Finishing)
Used for crisping up tofu, seitan, and eggplant bacon
Great for caramelizing BBQ sauce on smoked foods
Helps develop a crispy outer layer while keeping the inside tender
2. How to Enhance Smoke Flavor Without Overcooking
One of the biggest challenges in smoking vegetables on a Traeger is ensuring they absorb enough smoky goodness without becoming mushy or overly dry. Here’s how to get the best results:
- Use the Right Wood Pellets – Some wood pellets produce a stronger smoke than others. Mild woods like applewood work well for delicate veggies, while bold woods like hickory or mesquite are better for dense proteins like seitan and tofu.
- Keep Cooking Times Shorter Than Meat – Unlike meat, plant-based ingredients absorb smoke faster. Most vegetables and proteins only need 30 minutes to 1.5 hours of smoking to develop deep flavors.
- Use a Water Pan for Moisture – Placing a small pan of water inside your Traeger grill prevents ingredients from drying out and keeps the smoke circulation moist.
- Marinate Before Smoking – Marinating tofu, seitan, jackfruit, or mushrooms with liquid smoke, soy sauce, and smoked paprika enhances the depth of flavor.
- Finish with High Heat for Texture – After smoking, grilling at 300–350°F for a few minutes adds a crispy texture to foods like smoked tofu, eggplant bacon, and seitan ribs.
3. Choosing the Right Wood Pellets for Different Vegan Proteins
Each smoking wood type brings a different level of intensity and flavor. Pairing the right wood pellets with specific plant-based ingredients enhances the final dish.
Applewood (Mild & Slightly Sweet)
Best for: Jackfruit, sweet potatoes, cauliflower, mushrooms
Adds a subtle smoky sweetness that complements naturally mild flavors
Hickory (Bold & Classic BBQ Flavor)
Best for: Tofu, seitan ribs, tempeh, chickpea patties
Delivers a strong, traditional BBQ smoke flavor that mimics smoked meats
Mesquite (Earthy & Intense Smoke)
Best for: Mushrooms, tempeh, eggplant bacon, smoked chickpea patties
Has a bolder, more intense smoky flavor that works well with high-protein plant foods
Cherry or Maple (Mild & Slightly Fruity)
Best for: Smoked mac & cheese, BBQ chickpea patties, smoked sweet potatoes
Adds a hint of natural sweetness, great for balancing savory flavors
Pecan (Nutty & Well-Balanced Smoke)
Best for: Smoked vegan sausages, tempeh, portobello steaks
Offers a smooth, nutty flavor that enhances plant-based meats
Common Mistakes to Avoid When Smoking Vegan Dishes
Smoking plant-based foods on a Traeger grill can produce bold, smoky flavors and delicious textures—but it’s easy to make mistakes that can ruin the dish. Whether you’re preparing smoked tofu, jackfruit, seitan, or vegetables, avoiding these pitfalls will ensure your vegan BBQ is flavorful, well-balanced, and perfectly cooked.
1. Over-Smoking or Under-Smoking Plant-Based Proteins
One of the most common mistakes in smoking vegetables on a Traeger is too much or too little smoke exposure. Unlike meat, plant-based ingredients absorb smoke much faster, which means they don’t need as much time on the grill to develop flavor.
How to Avoid Over-Smoking:
Over-smoking results in a bitter, acrid taste that overpowers the natural flavors of tofu, seitan, and vegetables.
- Use mild woods like applewood or cherry for delicate ingredients.
- Smoke for the right duration—most vegan proteins only need 30 minutes to 1.5 hours.
- Keep temperatures low (200–225°F) for slow smoke infusion without overdoing it.
- Allow for airflow—using too much wood or keeping the lid shut too long can lead to creosote buildup, giving the food a harsh taste.
How to Avoid Under-Smoking:
Not enough smoke means the dish lacks depth and that signature BBQ essence.
- Use wood pellets with a bold flavor like hickory or mesquite for heartier ingredients (seitan, mushrooms, tempeh).
- Pre-smoke tofu, jackfruit, or mushrooms before grilling to deepen the smoky infusion.
- Check smoke output—your Traeger should produce a steady stream of thin, bluish smoke, not thick white smoke, which can lead to an unpleasant flavor.
2. Not Using a Proper Marinade or Dry Rub
Plant-based proteins like tofu, jackfruit, and seitan don’t naturally contain fats or collagen like meat does, meaning they need extra seasoning and moisture to develop complex flavors.
Why Marinades & Dry Rubs Matter:
- Skipping a marinade can result in bland, dry, and flavorless smoked food.
- Only using BBQ sauce without a base seasoning can lead to unbalanced flavors.
How to Fix It:
- Marinate for at least 30 minutes to 2 hours to let the flavors soak in before smoking.
Use dry rubs before smoking for a well-seasoned crust. Common ingredients include:
Smoked paprika (adds natural smokiness)
Garlic & onion powder (enhances umami depth)
Brown sugar or maple syrup (adds caramelization and balance)
Liquid smoke or soy sauce (amplifies smoky, umami flavors)
Glaze or sauce in the last 30 minutes to prevent sugars from burning.
3. Choosing the Wrong Wood Pellets for Certain Foods
Using the wrong smoking wood types can make or break a dish. Certain woods pair better with plant-based foods, while others can overpower delicate flavors.
Common Wood Pellet Mistakes:
- Using mesquite for delicate foods – Mesquite is extremely strong and can overpower ingredients like jackfruit or tofu.
- Only using one wood type – Combining different woods can enhance complexity.
- Ignoring sweetness levels – Fruity woods pair well with BBQ glazes, while bold woods complement smoky meats.
How to Choose the Right Wood Pellets:
Applewood – Best for jackfruit, sweet potatoes, smoked mac & cheese (mild & slightly sweet).
Hickory – Ideal for seitan ribs, BBQ tofu, smoked chickpea patties (bold & classic BBQ flavor).
Mesquite – Perfect for mushrooms, tempeh, eggplant bacon (earthy & strong).
Cherry or Maple – Great for BBQ glazes, smoked mac & cheese, sweet potatoes (mild & slightly fruity).
Pecan – Best for vegan sausages, portobello steaks, tempeh (nutty & well-balanced smoke).
FAQs
Smoking plant-based foods on a Traeger grill is a great way to enhance their flavor, but many people have questions about technique, moisture retention, and seasoning. Below are answers to some of the most commonly asked questions about vegan BBQ and smoking vegetables on a Traeger.
1. Can You Smoke Tofu on a Traeger?
Yes! Tofu is an excellent plant-based protein for smoking because it absorbs flavors well and develops a slightly firm, meaty texture when smoked properly.
How to Smoke Tofu on a Traeger:
Use extra-firm tofu – Soft or silken tofu won’t hold up well to smoking. Press it for at least 15 minutes to remove excess moisture.
Marinate for at least 30 minutes – Use a combination of soy sauce, maple syrup, smoked paprika, garlic powder, and liquid smoke for deep flavor.
Preheat your Traeger to 225°F – Lower temperatures allow the smoke to penetrate the tofu without overcooking it.
Smoke for 1 hour – Place tofu directly on the grill grates or in a grill basket, flipping halfway through for even smoking.
Finish with a glaze – Brush with BBQ sauce or teriyaki sauce in the last 10 minutes for extra caramelization.
Best Wood Pellets for Smoking Tofu:
Hickory – Bold, smoky, and perfect for BBQ-style tofu.
Applewood – Mild and slightly sweet, great for balancing savory flavors.
Pecan – Nutty and smooth, pairs well with soy-based marinades.
2. How Do You Prevent Veggies from Drying Out?
Vegetables can dry out quickly when smoked, especially those with low moisture content like bell peppers or zucchini. Here are some vegan BBQ tips to keep them juicy and flavorful:
Tips to Retain Moisture in Smoked Vegetables:
- Use a water pan – Placing a small pan of water inside your Traeger grill creates a humid environment that prevents vegetables from drying out.
- Lightly oil the vegetables – A thin coating of olive oil, avocado oil, or melted vegan butter locks in moisture and helps with caramelization.
- Smoke at lower temperatures – Stick to 200–225°F to allow vegetables to absorb smoke without becoming too soft or dry.
- Wrap in foil or use a grill basket – Wrapping delicate veggies like mushrooms or zucchini in foil prevents direct heat exposure while still allowing smoke to infuse the food.
- Marinate or brine beforehand – Soaking vegetables in a simple marinade of olive oil, balsamic vinegar, and smoked paprika helps retain moisture while adding depth of flavor.
Best Vegetables for Smoking:
High-Moisture Veggies: Cauliflower, eggplant, mushrooms, and bell peppers (hold up well to smoking).
Dense Veggies: Sweet potatoes, carrots, and beets (smoke beautifully at 225°F).
Leafy Greens: Kale and cabbage (quick smoking at 200°F for 15–20 minutes).
3. What Are the Best Seasonings for Plant-Based BBQ?
Seasoning is key to creating rich, smoky, and savory vegan BBQ dishes. Whether you prefer a dry rub, marinade, or glaze, the right combination of spices can enhance the depth of flavor in smoked plant-based foods.
Best Dry Rub Ingredients for Smoking Vegan Foods:
Smoked paprika – Adds a deep, natural smoky flavor.
Garlic powder & onion powder – Enhances umami and savory notes.
Brown sugar or maple sugar – Balances smokiness with a hint of sweetness.
Black pepper & cayenne – Adds heat and spice.
Cumin & coriander – Creates warm, earthy flavors.
Best Marinade Ingredients for Vegan BBQ:
Soy sauce or tamari – Adds umami and saltiness.
Apple cider vinegar or balsamic vinegar – Helps tenderize plant-based proteins.
Liquid smoke – Boosts smoky depth without overpowering.
Maple syrup or agave – Caramelizes for a sweet-smoky balance.
Dijon mustard – Adds tangy richness.
Best Glazes & Sauces for Smoked Vegan Dishes:
BBQ sauce (hickory, mesquite, or Carolina-style)
Teriyaki sauce (great for smoked tofu or tempeh)
- Buffalo sauce (for spicy smoked chickpea patties)
Sweet & smoky maple glaze (for smoked sweet potatoes or jackfruit)
By using the right seasonings, smoking at the right temperature, and choosing the best wood pellets, you can elevate your plant-based Traeger recipes to the next level.
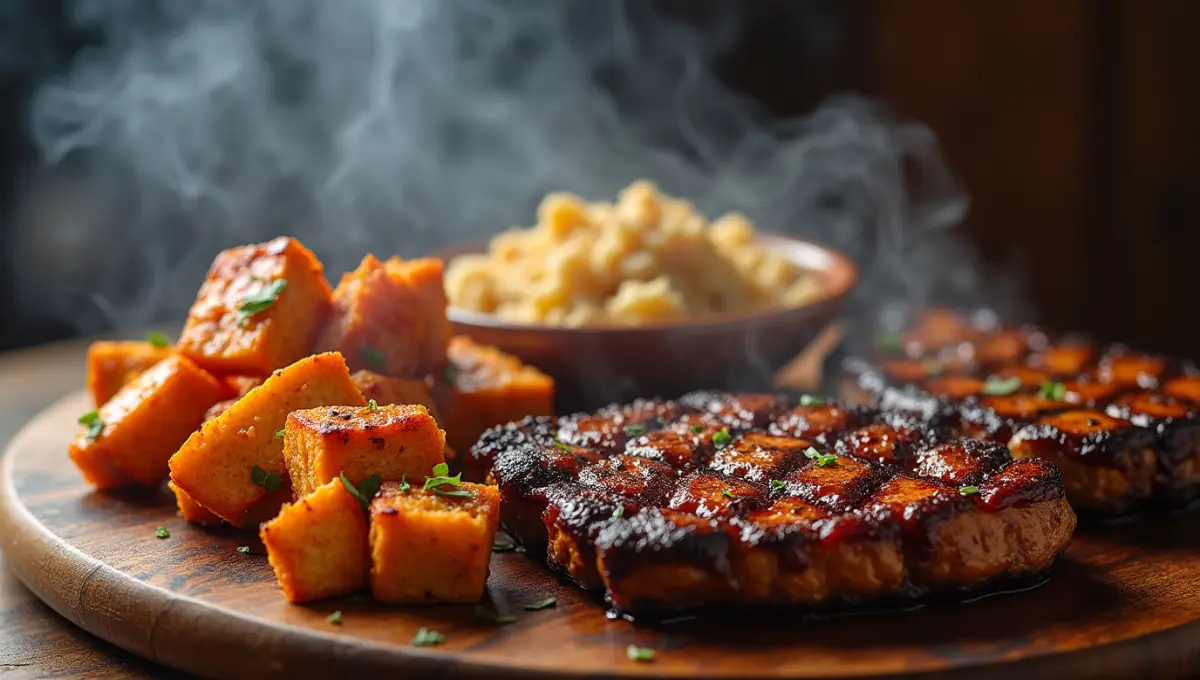
Conclusion
Smoking plant-based foods on a Traeger grill is a game-changer for anyone looking to enjoy bold, smoky flavors in a healthier way. Whether you’re making smoky jackfruit, BBQ tofu, or mesquite-smoked mushrooms, the right techniques and seasonings can transform simple ingredients into incredible dishes.
If you haven’t tried smoking vegetables, tofu, or seitan yet, now is the perfect time. These recipes are easy to follow, full of flavor, and perfect for cookouts, weeknight dinners, or meal prep. Give them a try and see how a little smoke can elevate your plant-based cooking.
We’d love to hear about your results! Share your experiences, favorite wood pellet combinations, or any creative twists you added to these recipes. Let’s keep exploring new ways to enjoy smoky, plant-based dishes together.
3 thoughts on “Traeger Recipes: 10 Best-Smoked Vegan Dishes You’ll Love”