
There’s something timeless and comforting about a jar of Strawberry Preserves—sweet, fruity, and bursting with natural flavor. Unlike store-bought versions loaded with refined sugars and additives, this Strawberry Preserves recipe is 100% plant-based, simple to make, and perfect for anyone embracing a clean eating lifestyle.
Made with just a handful of wholesome ingredients, this vegan strawberry jam skips the pectin and refined sugar, relying on the natural sweetness of fresh strawberries and a splash of lemon. It’s the ultimate natural fruit spread you can feel good about—delicious on toast, stirred into oatmeal, or spooned over dairy-free yogurt. Whether you’re new to making homemade preserves or looking for a fuss-free, refined sugar-free option, this recipe is as easy as it is rewarding.
Why You’ll Love This Strawberry Preserves Recipe
1. Easy and Beginner-Friendly
If you’re new to making preserves, this Strawberry Preserves recipe is the perfect place to start. With just five straightforward steps, it’s nearly foolproof—even if you’ve never made preserves before. There’s no need for complicated canning equipment, and the small batch size makes it easy to manage in any kitchen. Check out other beginner-friendly recipes like the Bisquick Strawberry Shortcake Vegan Twists for more simple plant-based treats.
2. Only a Few Natural Ingredients
This Strawberry Preserves recipe keeps it simple and wholesome. You’ll only need fresh strawberries, lemon juice, and a natural sweetener like maple syrup or cane sugar. That’s it—no artificial ingredients, stabilizers, or fillers. It’s a back-to-basics approach that lets the fruit shine, perfect for pairing with recipes like Vegan Peanut Butter Brownies.
3. No Pectin, Refined Sugar, or Animal-Based Products
Unlike traditional jam recipes, this version skips the pectin and avoids refined sugars entirely. It’s a completely vegan-friendly and plant-based alternative that still delivers the same thick, spoonable texture. The natural sugars from the strawberries and your chosen sweetener do all the work, making it a smart choice for those avoiding processed ingredients.
4. Perfect for Clean Eating and Plant-Based Lifestyles
Because it uses natural fruit, minimal processing, and no animal products, this Strawberry Preserves recipe fits beautifully into a clean eating routine. Whether you’re following a whole food plant-based diet or simply trying to eat more mindfully, it’s a delicious way to satisfy your sweet tooth without compromising your values or nutrition goals.
5. Suitable for Breakfast, Desserts, or Snacks
These homemade Strawberry Preserves are as versatile as they are tasty. Spread them over toast, swirl them into overnight oats, layer them in a parfait, or even use them to top dairy-free ice cream. No matter when or how you enjoy them, this vegan strawberry jam adds a burst of flavor to your favorite meals and treats. Try it with Cracker Barrel Pancake Recipe Vegan 3 Ways for a delightful breakfast combo.
Ingredients You’ll Need
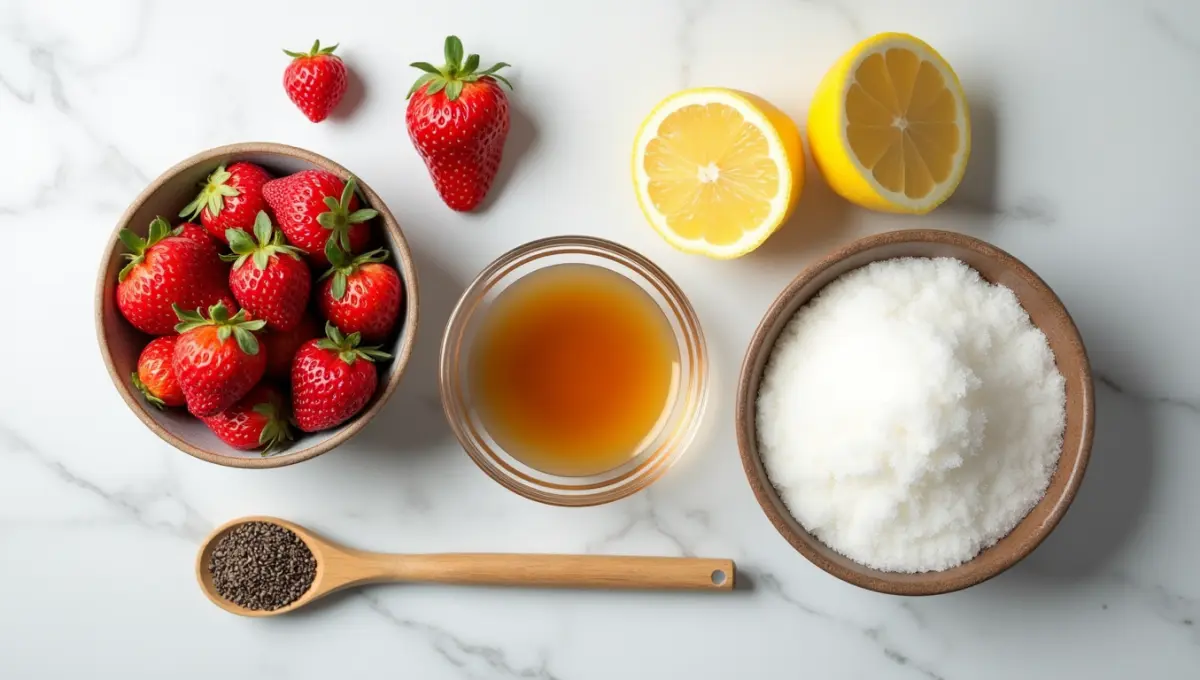
One of the best things about this Strawberry Preserves recipe is how few ingredients it requires. Each one supports a whole food plant-based diet, making this an ideal choice for clean eating and simple living. Here’s what you’ll need to make a small batch of naturally sweet, delicious preserves:
- Fresh strawberries (preferably organic): The heart of the recipe, strawberries provide natural sweetness and a rich, fruity base. Choosing organic fruit ensures you’re avoiding pesticides and getting the best flavor possible. For high-quality organic strawberries, consider Fresh Organic Strawberries.
- Maple syrup or cane sugar (vegan sweetener): These natural sweeteners are excellent alternatives to refined white sugar. Maple syrup adds depth and a hint of caramel, while cane sugar keeps things classic and clean. Both work perfectly in this Strawberry Preserves.
- Lemon juice (natural pectin substitute): Lemon juice helps balance the sweetness while naturally thickening the preserves. It’s a key ingredient that replaces the need for added pectin and supports a plant-based lifestyle.
- Optional: chia seeds (natural thickener): If you’d like an even thicker texture or added fiber, chia seeds are a great addition. They absorb moisture and create a gel-like consistency while keeping everything within the realm of whole food nutrition. Try Organic Chia Seeds for a premium option.
Equipment Required
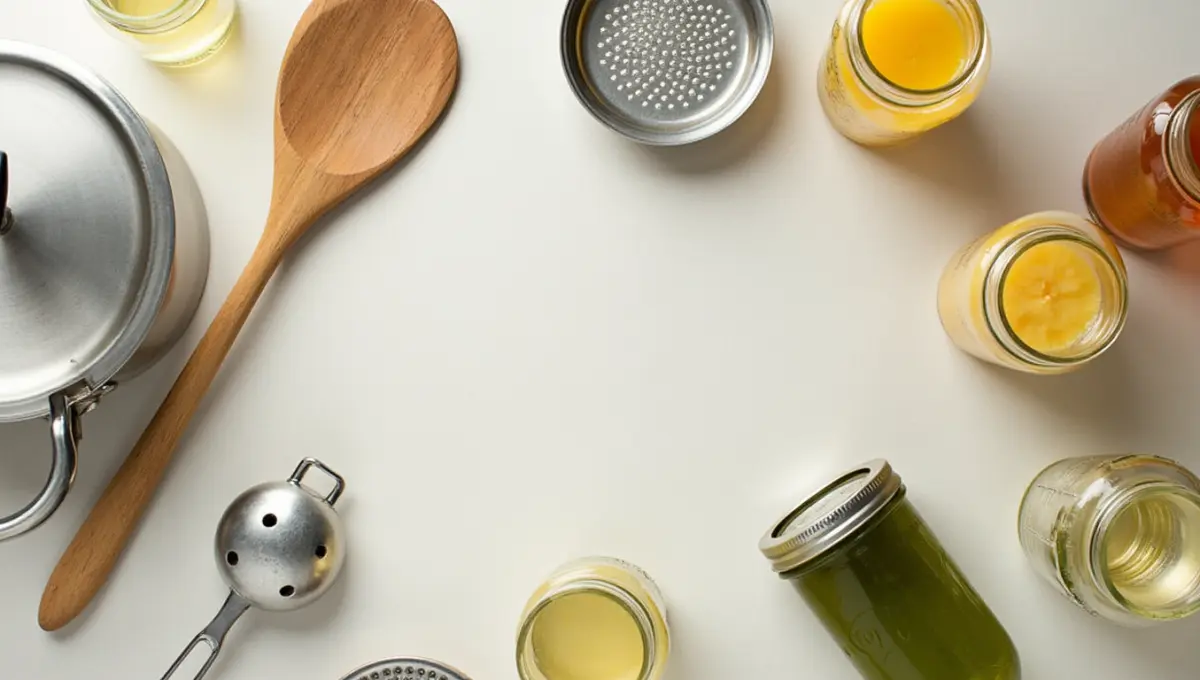
You don’t need any special equipment to make this Strawberry Preserves recipe—just a few basic kitchen tools that you likely already have at home. These items will help ensure your preserves cook evenly, reach the perfect consistency, and are stored safely for later enjoyment. Keeping things simple also supports eco-friendly recipes and low-waste kitchen habits.
- Medium saucepan: A heavy-bottomed saucepan works best for evenly heating and gently simmering the fruit. It gives your Strawberry Preserves a slow-cooked texture and helps prevent sticking or burning.
- Wooden spoon: Ideal for stirring without reacting with acidic ingredients like lemon juice. A wooden spoon helps mix everything evenly while maintaining a gentle touch during the cooking process.
- Canning jars or mason jars: These classic mason jars are perfect for storing your finished preserves. They’re reusable, easy to seal, and align well with preserving techniques used in traditional and modern kitchens alike.
- Potato masher: Before cooking, a potato masher allows you to break down the strawberries to your desired consistency. Whether you prefer a chunkier preserve or a smoother spread, this tool gives you full control.
- Sterilized storage jars: Clean, sterilized jars are essential if you plan to store your Strawberry Preserves for more than a few days. Proper sterilization supports food safety and allows you to enjoy your preserves over time without spoilage.
How to Make Strawberry Preserves in 5 Easy Steps
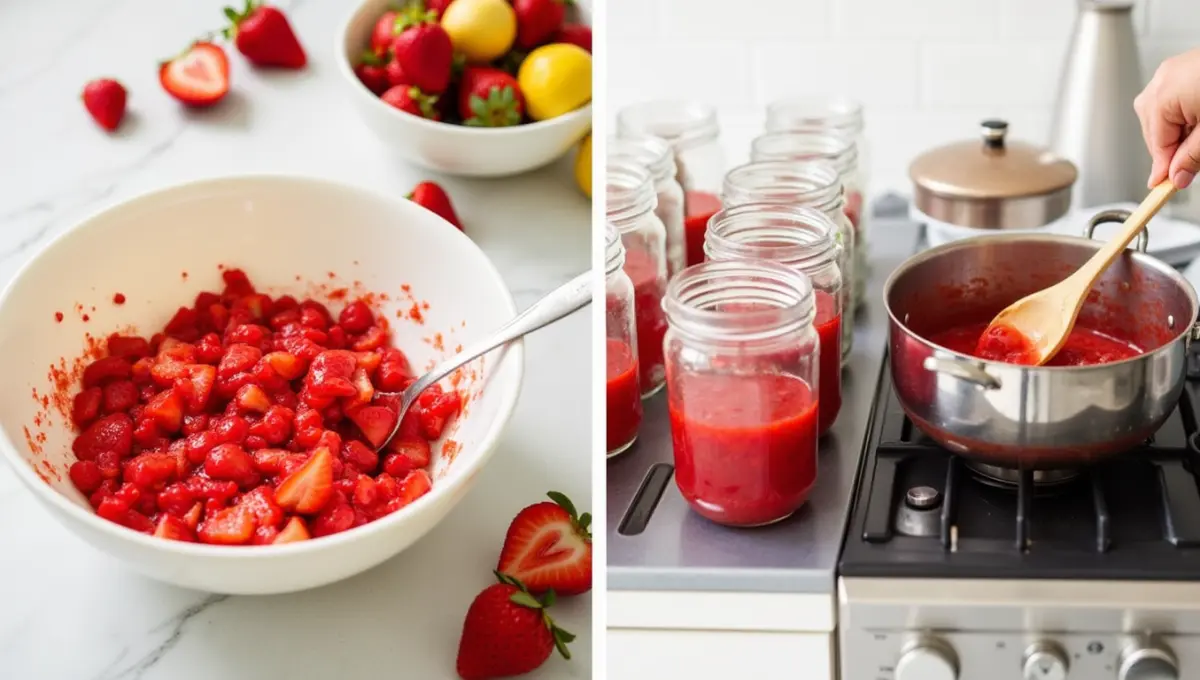
This Strawberry Preserves recipe is as easy as it is delicious. Whether you’re new to preserving or just looking for a simple, clean version, these five steps will walk you through the process from fresh berries to jarred goodness. Each step is designed to help you create a small batch of no pectin strawberry preserves with a beautiful texture and rich flavor.
- Wash and Hull Strawberries: Start by washing your strawberries thoroughly under cold water. Remove the green tops (hull them) using a small knife or a hulling tool. Use fresh, organic strawberries if possible to get the best results for your natural fruit spread.
- Mash the Strawberries: Place the hulled strawberries in a medium saucepan. Use a potato masher to break them down to your desired consistency. You can keep it chunky for a rustic feel or mash more for a smoother finish. This step begins the base of your slow-cooked fruit preserves.
- Add Lemon Juice and Sweetener: Add freshly squeezed lemon juice (for natural thickening) and your chosen sweetener—maple syrup or cane sugar—into the saucepan. Stir everything well with a wooden spoon, ensuring even distribution. These natural sweeteners enhance flavor while keeping your recipe refined sugar-free and plant-based.
- Cook Slowly Until Thick: Simmer the mixture over medium-low heat, stirring frequently to prevent burning. Let it cook for 20–30 minutes, or until it thickens to a jam-like consistency. This is the heart of the slow-cooked fruit preserves process, where the flavors deepen and the texture develops naturally—no pectin required.
- Cool, Store, and Enjoy: Remove the saucepan from heat and let your Strawberry Preserves cool slightly. Transfer the preserves into sterilized mason jars, seal tightly, and refrigerate. The preserve will continue to thicken as it cools and is perfect for spreading on toast, swirling into oats, or topping off desserts.
Storage Tips & Shelf Life
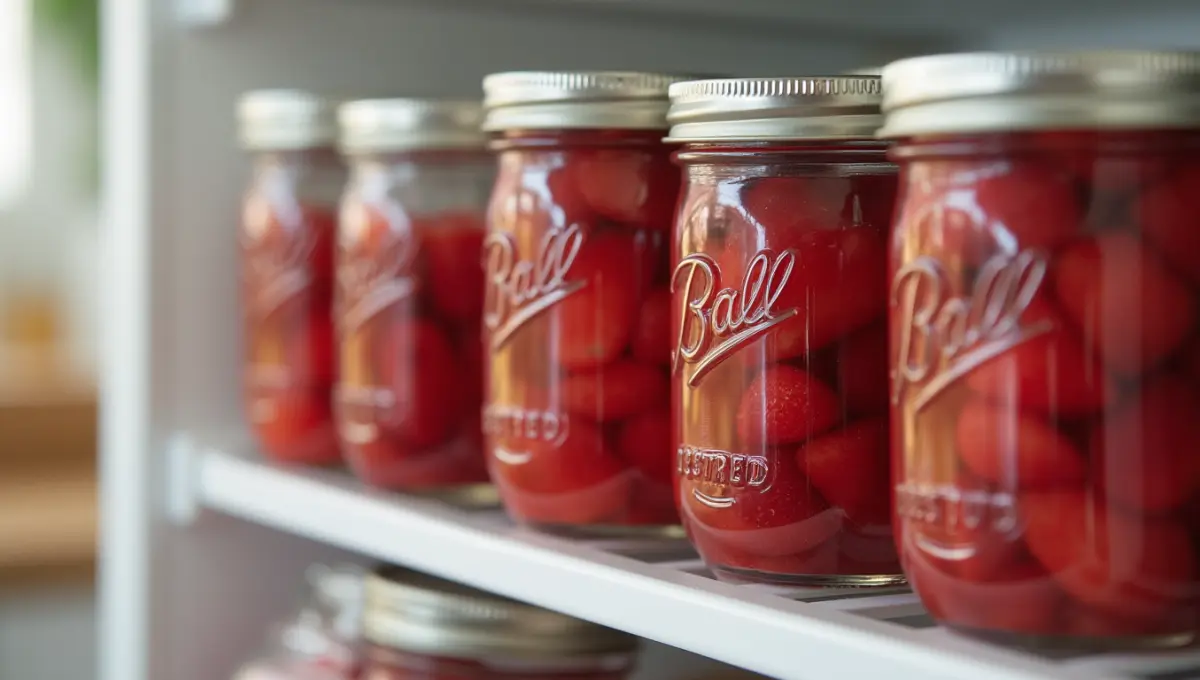
Once your Strawberry Preserves are made, proper storage is key to maintaining freshness, flavor, and food safety. Whether you’re planning to enjoy them within the week or stock up for later, here’s how to store them effectively while staying aligned with eco-friendly and sustainable living practices.
1. How to Refrigerate Strawberry Preserves
After cooking and slightly cooling your Strawberry Preserves, transfer them into sterilized storage jars or mason jars with tight-fitting lids. Let the jars cool to room temperature before placing them in the refrigerator. When properly stored this way, the preserves will stay fresh for up to 3 weeks. Always use a clean spoon when serving to avoid contamination.
2. Canning for Longer Shelf Life
For longer-term storage, you can use basic canning techniques. While this recipe is best for small batches, hot water bath canning is a safe method to extend shelf life. Pour the hot preserves into sterilized canning jars, seal with new lids, and process in boiling water for about 10 minutes. Properly canned Strawberry Preserves can last up to 12 months in a cool, dark pantry. Learn more about preserving techniques in our Strawberry Freezer Jam Recipe.
3. Tips for Freezing Preserves
Freezing is a great option if you want to skip canning altogether. Let your preserves cool completely, then pour into freezer-safe glass jars or BPA-free containers—just leave a little space at the top for expansion. Your frozen Strawberry Preserves will keep for up to 6 months and can be thawed overnight in the fridge when ready to use.
4. Eco-Friendly Storage Options
To keep your recipe as sustainable as it is delicious, consider storing your Strawberry Preserves in reusable glass jars, compostable labels, and avoiding single-use plastics. Not only do these choices reduce waste, but they also complement a plant-based, eco-conscious lifestyle—from preparation to preservation.
FAQs
Here are some of the most common questions about making Strawberry Preserves, especially for those following a plant-based or refined sugar-free lifestyle.
1. Can I Use Frozen Strawberries?
Yes, you can use frozen strawberries to make Strawberry Preserves. Just be sure to thaw them completely and drain any excess liquid before starting the recipe. While fresh, organic fruit is ideal for the best flavor and texture, frozen berries are a convenient and cost-effective option—especially outside of strawberry season.
2. Do I Need Pectin for This Recipe?
No, you do not need pectin to make this Strawberry Preserves recipe. The natural pectin in the strawberries, along with lemon juice, is enough to help the preserves thicken during the slow cooking process. This makes it a perfect choice for those seeking a no pectin strawberry preserve that’s easy and plant-based.
3. Is This Strawberry Preserve Sugar-Free?
This Strawberry Preserves is refined sugar-free, but not completely sugar-free. It uses natural sweeteners like maple syrup or cane sugar in small amounts to enhance the fruit’s flavor. If you want a lower-sugar option, you can adjust the amount or experiment with unsweetened versions using just fruit and lemon juice.
Conclusion
Making your own Strawberry Preserves at home has never been easier—or more rewarding. With just a few natural ingredients and simple steps, you can create a vibrant, delicious fruit spread that’s perfect for breakfast, snacks, or desserts. Whether you’re following a plant-based lifestyle, looking for a refined sugar-free option, or just love the taste of fresh, slow-cooked berries, this recipe is a go-to favorite for any home cook. For more plant-based dessert ideas, explore our Apple Coffee Cake Recipe Vegan Dessert.
We hope you enjoyed this easy and wholesome take on Strawberry Preserves. If you tried the recipe, let us know how it turned out in the comments below. We’d love to hear your tips, tweaks, or favorite ways to enjoy it. And don’t forget to share this post with fellow food lovers who appreciate simple, clean, and flavorful recipes!
1 thought on “Strawberry Preserves Recipe: 5 Easy Steps to Make It”